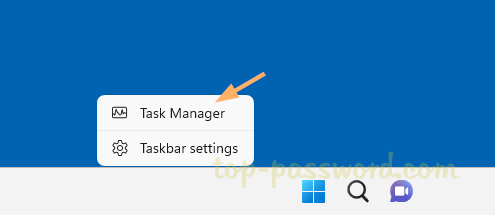
When you right-click the taskbar in Windows 11, you may find that the Task Manager option is missing from the context menu. If you want to restore this reduced functionality, here’s a simple method to add the Task Manager option back to taskbar context menu in Windows 11.
How to Add the Task Manager option to Taskbar Context Menu in Windows 11
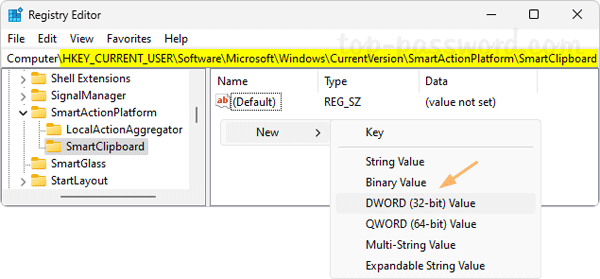
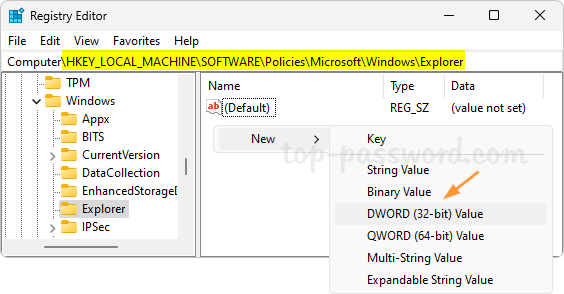
- Open Registry Editor and navigate to:
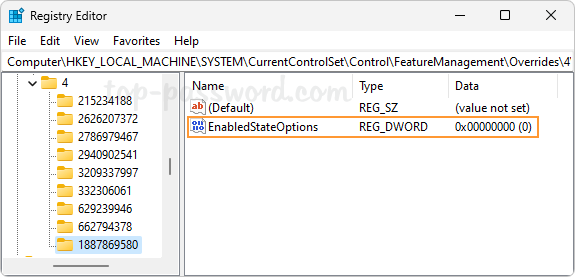
HKEY_LOCAL_MACHINE\SYSTEM\CurrentControlSet\Control\FeatureManagement\Overrides\4. Right-click the 4 key in the left sidebar and select New -> Key.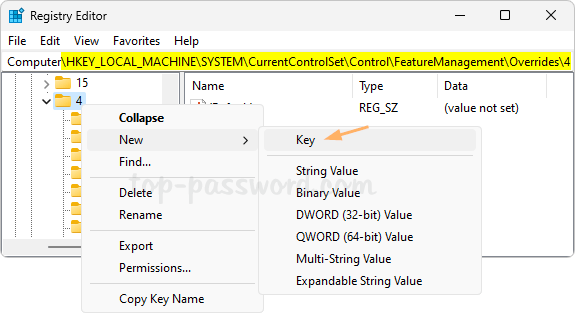
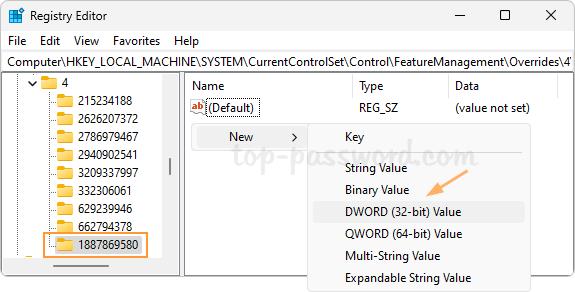
- Name the new key as 1887869580, then select it. In the right pane, right-click the empty area and choose New -> DWORD (32-bit) Value.
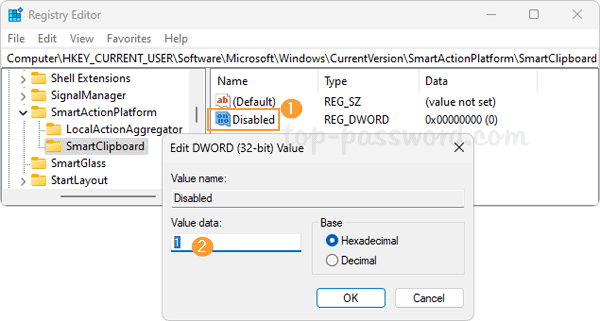
- Name the DWORD as EnabledStateOptions, and leave its value data at 0 (unchanged).
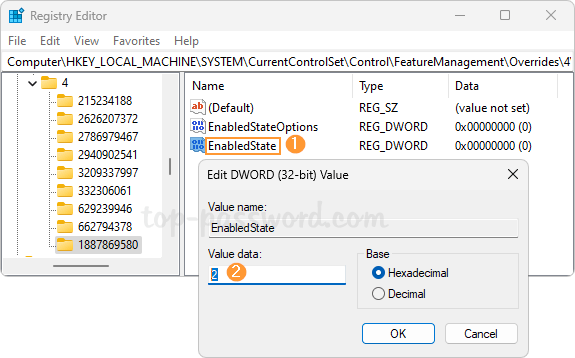
- Create a second DWORD value and name it EnabledState. Double-click it and set its value data to 2.
- Close Registry Editor and reboot your computer to apply the changes. The next time you right-click the taskbar, the Task Manager option should appear in the context menu of the taskbar.
That’s it!