Archive for the ‘Windows 7’ category

How to Encrypt Your Files with EFS in Windows

November 20th, 2012 by Admin

EFS (Encrypting File System) is a built-in component of the NTFS file system, which comes with all professional versions of Windows since Windows 2000. Using EFS, you can encrypt files and folders so that only authorized logged-on users can view the data. If someone else logs in with unauthorized users, or boots from a Windows PE or Linux CD, or removes the hard drive, the files remain encrypted and they are inaccessible.

To use EFS, you simply change the property of a folder and enable encryption. Once a folder is encrypted with EFS, all the files you create within that folder or move into that folder are automatically encrypted.

How to Encrypt Your Files with EFS in Windows?

Select one or multiple files and folders in Windows Explorer, right-click the selection afterwards and select Properties from the context menu.
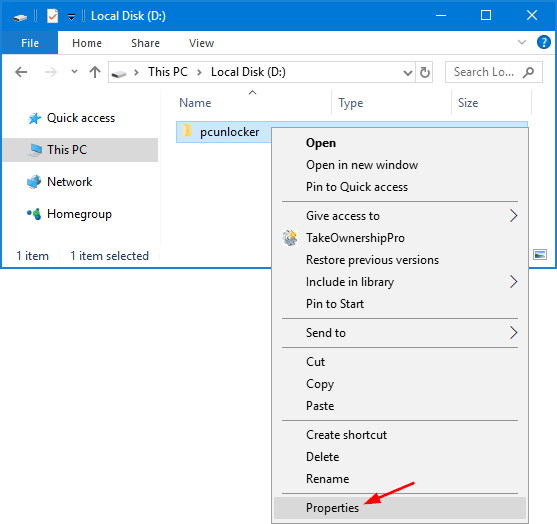
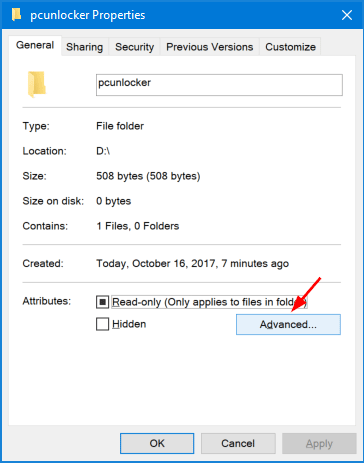
Click on Advanced button from the Properties window.
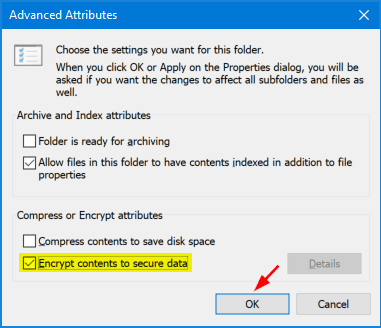
Tick the Encrypt contents to secure data checkbox on the new window, and click OK.
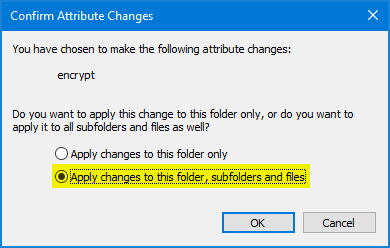
If you have selected at least one folder, you will be asked if you only want to encrypt the root files of that folder, or files in sub-folders as well.
The files and folder in question are then displayed in green in Windows Explorer. Congratulations, you have just encrypted your first files or folders with EFS.

Note: If the original EFS certificate is lost or corrupted in your system, you’ll lose access to your EFS encrypted files. It is important to backup your EFS certificate in a safe location.

Conclusion

Because it is already included in a typical Windows installation, EFS is the quickest way to encrypt your files if you’re already using Windows. There’s nothing to download or install and encrypting a folder can be done with just a few clicks. Unless you really have very sensitive information that requires a very strong encryption solution, EFS should suffice.
Forgot Administrator Password for Your Windows 7 Laptop

November 20th, 2012 by Admin

I forgot Windows 7 administrator password and can not log into my laptop. I have tried every password I can think of and can’t remember the correct one. I have tried putting my computer in safe mode, does not work. All of my school files are on my computer. If anyone knows how I can reset my password myself, that would be great.

Most password recovery programs require your system to up and running in order to crack Windows password. But what if you can’t log in to Windows. Reset Windows Password utility is a Live disc which can be burned onto a CD or USB drive. Boot your locked computer from the Live disc and it allows you to reset Windows 7 password easily.

How to Reset Forgotten Administrator Password for Your Windows 7 Laptop?

  1. Download the Reset Windows Password utility onto an alternative computer. Unzip the download file, you’ll get the ResetWindowsPwd.iso file. Burn the ISO file to CD using an CD burning software such as ISO2Disc or BurnCDCC.
  2. Set your Windows 7 laptop to boot from the Live CD. To boot from the CD-ROM drive, you may need to press a key such as F8 or F12 while your computer is starting up and set CD/DVD as the first boot device in BIOS.
  3. After the CD boots, you will have a mini operating system loaded into memory which will launch Reset Windows Password utility. It will not install anything to your hard drive.
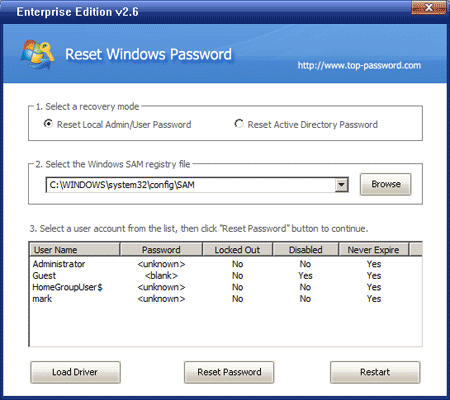
  4. Click on the Reset Windows Local Admin/User Password option, the program will automatically detect the Windows SAM registry hive and local user accounts existing in your local computer.
  5. Choose the administrator account and click on Reset Password button, it will remove your forgotten Windows 7 administrator password in a short time.

Restart the laptop and reject the Live CD, you can then log in to the administrator account with a blank password. After logging into your Windows 7 system, you’ll find that all your files on your hard drive are there and remain intact.

How to Enable GodMode in Windows 8/7

October 31st, 2012 by Admin

GodMode is actually a hidden (or, at least it used to be hidden) developer shortcut in Windows 8/7 that provides more direct access to features and functions of the operating system. To be clear, GodMode doesn’t add functionality. But it helps administrators work more efficiently by collecting all these tweaks and controls in one place.

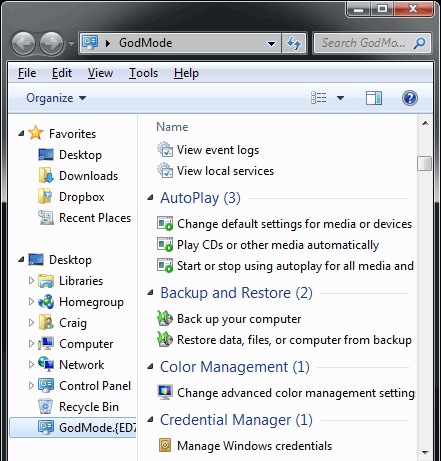
To access the special capabilities of the GodMode folder, create a new folder anywhere on your Windows 8/7 computer and name it:

GodMode.{ED7BA470-8E54-465E-825C-99712043E01C}

Once renamed, the icon will change to a control panel looking icon, and when opened you will be presented with a plethora of different tweaking options.

On my Windows 7 Professional machine, I was shown nearly 50 sections with quick links to configuration options. I find placing this GodMode icon in my desktop very helpful. Whenever I need to open options like network and sharing,printers etc, it makes it very easy to find all this icons placed inside one icon rather than going for the control panel.

How to Hack Windows Administrator Password

October 30th, 2012 by Admin

Most of us have experienced a situation where in we need to gain access to a computer which is password protected or at times we may forget the administrator password without which it becomes impossible to login to the computer. So here is an excellent hack.

In this tutorial we’ll show you how to hack Windows administrator password on Windows 8/7/Vista/XP. The only requirement for this is that you need to find an alternative computer to create a password hacking Live CD. Here is a step-by-step instruction to hack Windows administrator password.

  1. Click here to download the Reset Windows Password software. Once the download is complete, unzip the download file and you’ll find the CD ISO image: ResetWindowsPwd.iso.
  2. Burn the ISO image to an empty CD using any CD/DVD recording software such as BurnCDCC or ISO2Disc.
  3. Place the Live CD you’ve created in the CD drive of your computer with the administrator password you want to hack. Head into the computer BIOS and set your computer to boot from CD.
  4. The boot procedure may take one or two minutes, and the Reset Windows Password program will start.
  5. From the main window of Reset Windows Password program, you could see the Windows SAM registry file and user accounts inside the SAM file.
  6. Choose the administrator account, and then click on the Reset Password button. It will blank your forgotten/unknown password instantly.

Now remove the password hacking Lice CD and restart the computer. You can then log in to the administrator account with a blank password. This hack works even if you forgot the administrator password and can’t log in to Windows.

How to Bypass Windows 7/Vista/XP Admin Password

October 26th, 2012 by Admin

For most Windows users, forgetting the password to an administrator account can be devastating. Hacking your way into the computer is not always easy and trying to remember the password may not do you any good either. Luckily there is a powerful recovery software which allows you to bypass Windows 7/Vista/XP admin password in minutes.

With Reset Windows Password utility you can bypass Windows admin password through booting your computer from a CD or USB drive. Quickly regain access to your locked computer when you forgot the administrator password. This method is a very simple one. You just need to download the software on an alternative computer, and create a bootable CD or USB drive. So you can then use it to boot your computer and remove the forgotten admin password easily.

How to Bypass Windows 7/Vista/XP Admin Password?

  1. Download the zip archive of Reset Windows Password utility to an alternative computer. Once you download the zip file, just unzip it and burn the ResetWindowsPwd.iso file to a blank CD or USB flash drive using ISO2Disc.
  2. Insert the bootable CD/USB drive into the target computer with a forgotten administrator password. Power on the computer and set it to boot from CD or USB, not your local hard drive.
  3. Shortly after loading the operating system inside the CD/USB drive, it will launch the Reset Windows Password program. You’ll see the Windows SAM registry hive and a list of Windows user accounts which are detected by the program.
  4. Choose the administrator account and then click on Reset Password button, it will remove your Windows administrator password immediately.
  5. Remove the bootable CD or USB drive. Restart the computer and you can then log in to your administrator account with a blank password.

With Reset Windows Password utility you can also unlock any locked-out or disabled Windows accounts, and bypass domain administrator passwords on a domain controller. I think, this would be the perfect password recovery tool for both home and business users alike.

How to Secure USB Drive with BitLocker To Go

October 26th, 2012 by Admin

Losing a USB flash drive can be the stuff of nightmares if it contains sensitive or valuable information. If your computer is running the Ultimate or Enterprise edition of Windows 8/7/Vista, you can use Microsoft’s included BitLocker To Go feature to encrypt your entire USB drive.

BitLocker To Go allows you to encrypt the data stored on a USB drive and restrict access with a password. Without the password, the USB drive is worthless. When you connect the encrypted USB drive to a Windows computer, you are prompted for the password, and upon entering it you can read and write to the drive as you normally would.

In this article I will walk through the steps of securing a USB drive (thumb drive) with Bitlocker To Go in Windows 7.

How to Secure USB Drive with BitLocker To Go?

Connect the USB drive for which you want to enable BitLocker Encryption.

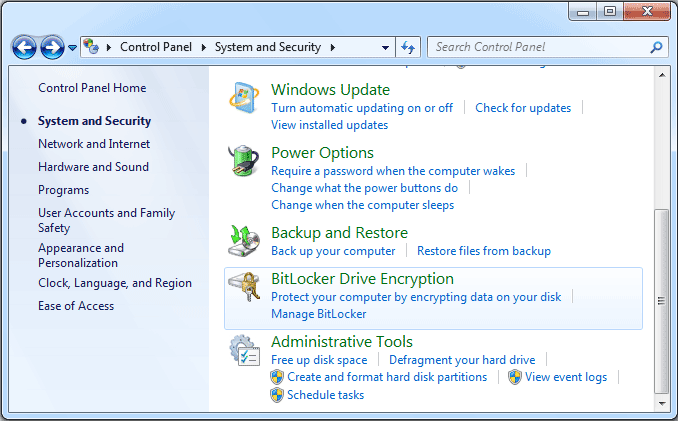
Click Start, then click Control Panel. Click System and Security.

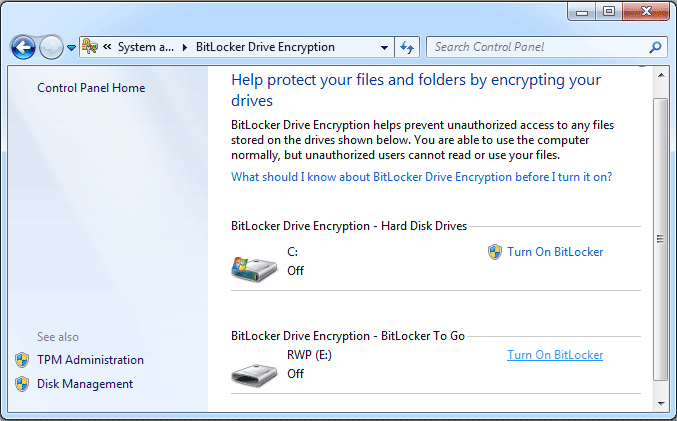
Click BitLocker Drive Encryption. This screen presents a list of all the drive partitions and the connected USB drives which could be protected with BitLocker To Go.

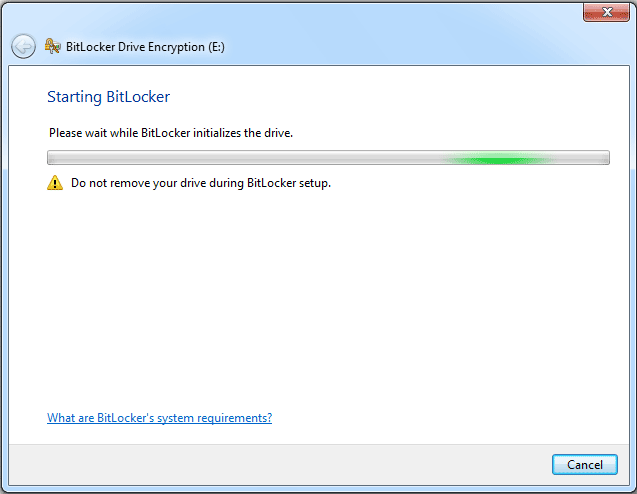
Click the Turn On BitLocker link option near your USB drive. It starts the initialization process of BitLocker Drive Encryption.

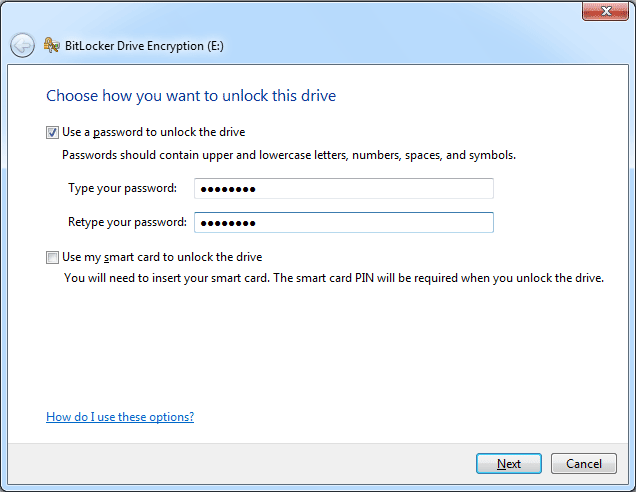
Once the initialization process is complete, BitLocker To Go will prompt you to set up a password that you will use to unlock the drive. If you have a smart card, you can use its PIN to unlock the drive.

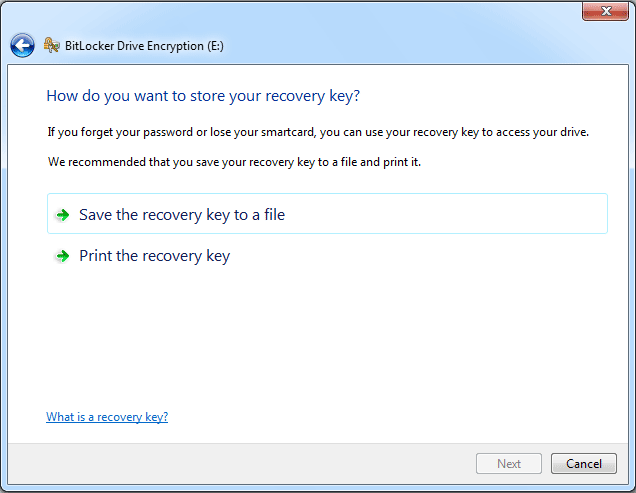
After you set up a password or use a smart card, BitLocker To Go will prompt you to store a recovery key. You can use the recovery key to unlock your drive in the event that you forget the password or lose your smart card.

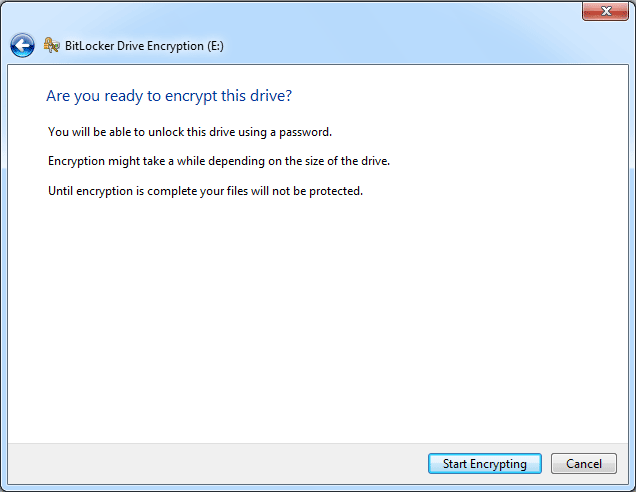
When you create the password and save your recovery key, you’ll be prompted to begin the encryption process.

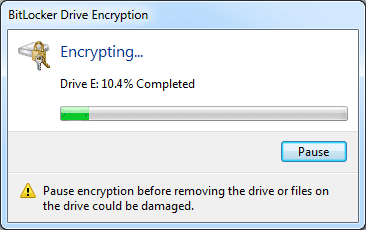
Click on Start Encrypting button. The amount of time that it will take to complete the process will depend on how large the drive is.

When the encryption is complete, you’ll notice that the drive icon shows a lock on the drive.

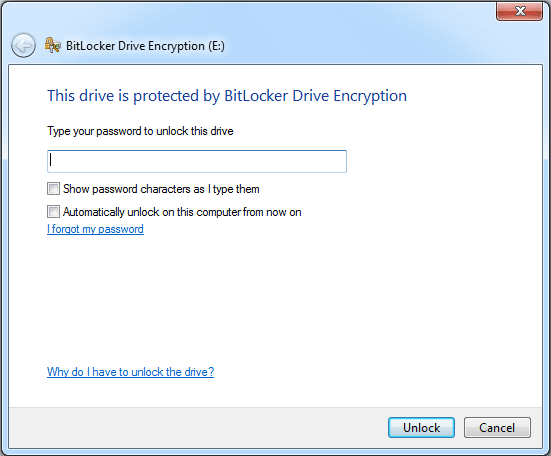
The next time you plug in the USB drive to a Windows machine you will be prompted to enter the password to gain access to the drive.

In future, any file you save on that drive will be encrypted automatically.

Backup and Restore Saved Passwords in Windows Vault

October 24th, 2012 by Admin

Windows 7 includes a new feature called Windows Vault, which is actually a new name for Stored User Names and Passwords in Windows Vista/XP. Whenever you access a file share on another machine, map a drive to a remote server, or connect to a Windows domain, you will be prompted to provide a username and password as shown below.

If you select the “Remember my credentials” checkbox, it will store the credentials in Windows Vault. Next time, when you connect to the same resource, your saved credentials will be used automatically, and you will not be prompted for credentials. This can be a great time-saving feature if you need to access the same resource frequently.

In this tutorial we’ll show you how to backup and restore the save passwords in Windows Vault. You can access the Windows Vault through the Credential Manager. The easiest way is by just typing “Credential Manager” in the Windows 7 Start Menu search prompt. You can also access the Credential Manager through the Control Panel.

How to Backup Saved Passwords in Windows Vault?

  1. Click on the Back up vault link in the Credential Manager. This will bring up the Stored User Names and Passwords wizard.
  2. Select a file location to backup the stored logon credentials on your computer. Click Next.
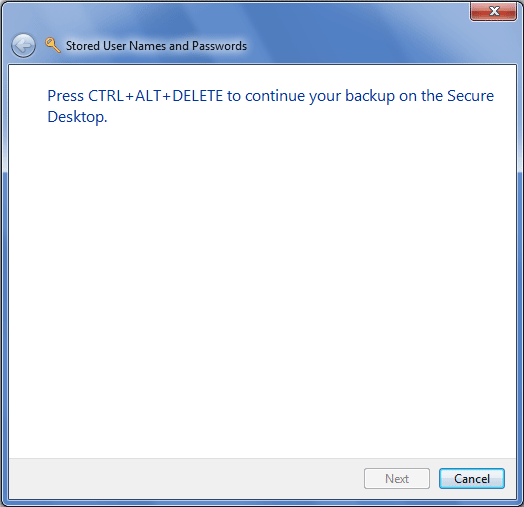
  3. In next window, you will be asked to press Ctrl+Alt+Delete on your keyboard.
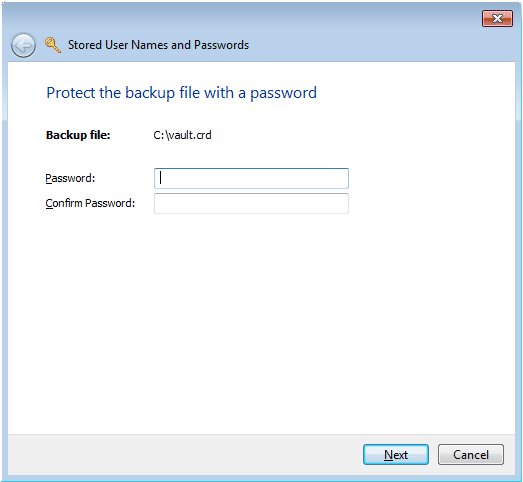
  4. Enter a new password to protect the backup file. Confirm the password and click Next.
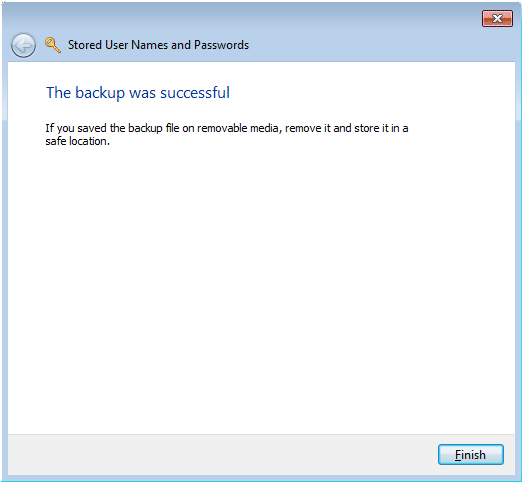
  5. Your screen will turn black. Click Finish to complete the backup wizard.

How to Restore Windows Vault Passwords?

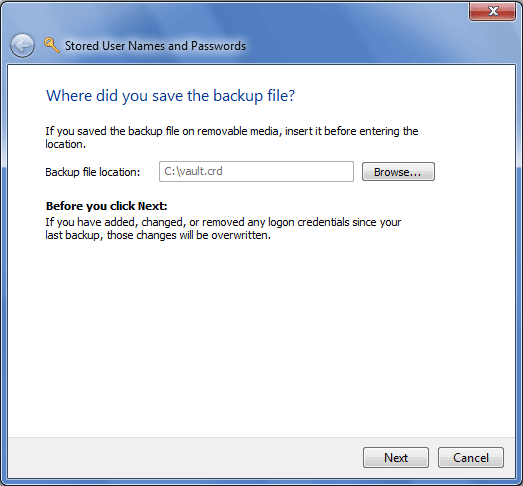
  1. Click on the Restore vault link in the Credential Manager. This will bring up the Stored User Names and Passwords wizard.
  2. Select your credential backup file which you have created previously. Click Next.
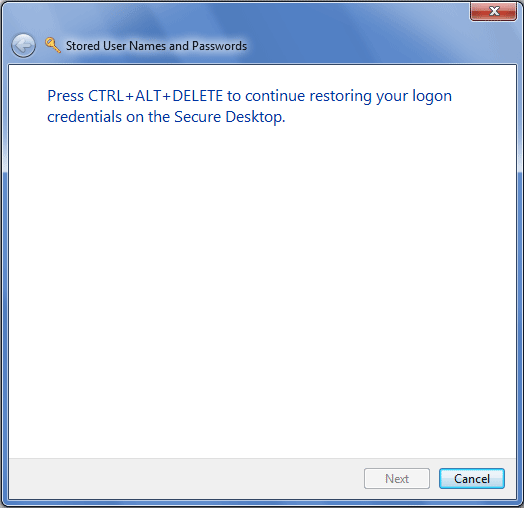
  3. You are asked to press Ctrl+Alt+Delete in order to continue.
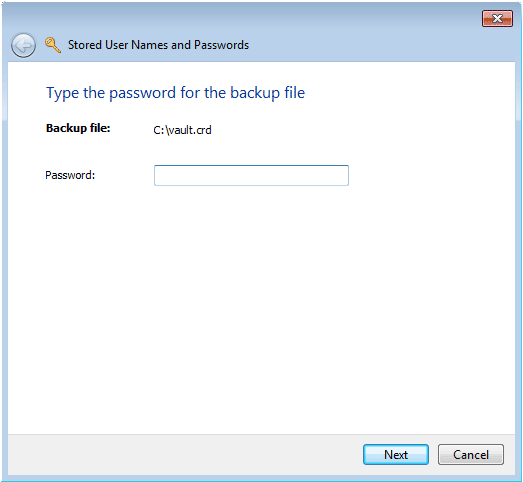
  4. Type the password for your password-protected credential backup file. Click Next.
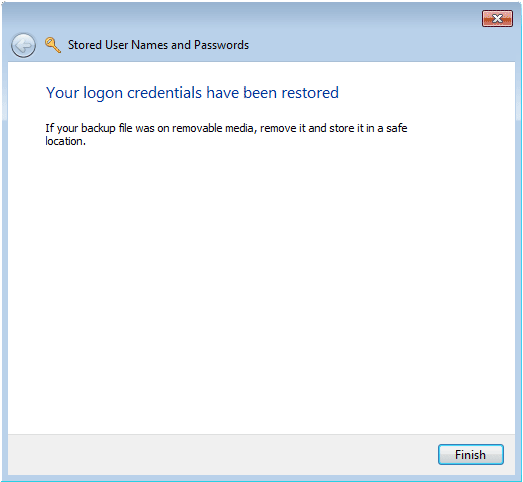
  5. Your Windows credentials have been restored. Click Finish.