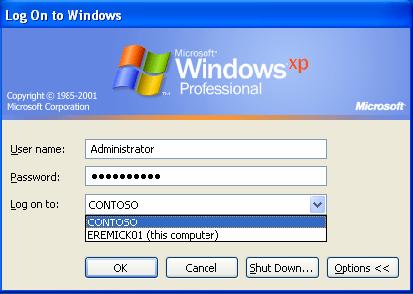
After joining your PC to a domain, you can select to log on Windows with either a domain account or a local account. In Windows XP and Windows 2003, there is a drop-down menu labeled “Log on to” in the login dialog box. From there you can select a domain name from domain logon, or select “this computer” for local logon.
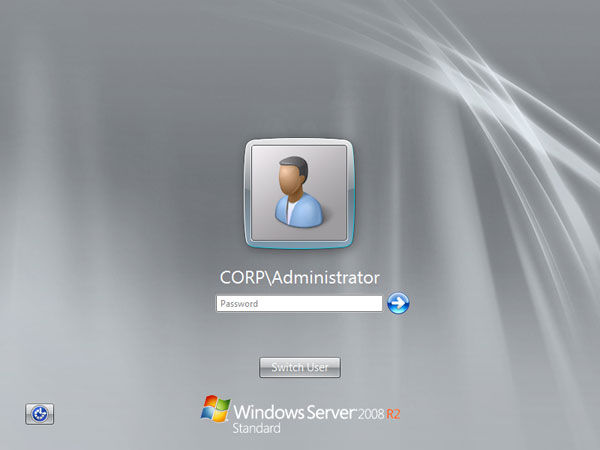
However, since Windows Vista and Windows 2008, the drop-down menu no longer exists and things get a bit tricky if you want to log on to a local account on a domain joined computer. So here I’ll explain how to log into local account instead of domain account in Windows 8, 7, Vista, Windows Server 2012 and 2008 (R2).
How to Log on to Local Account Instead of Domain Account?
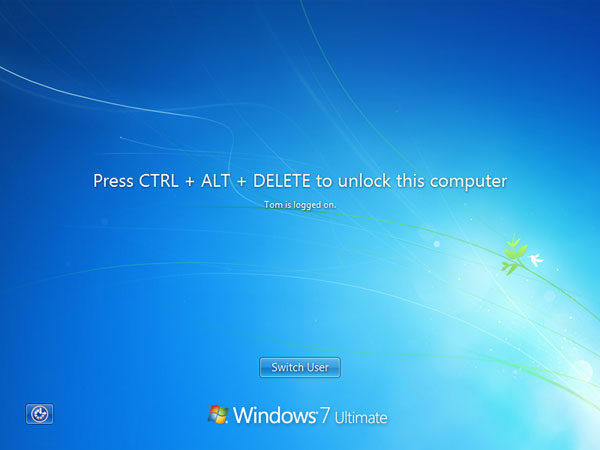
- When you come to the Windows login screen, click on Switch User.
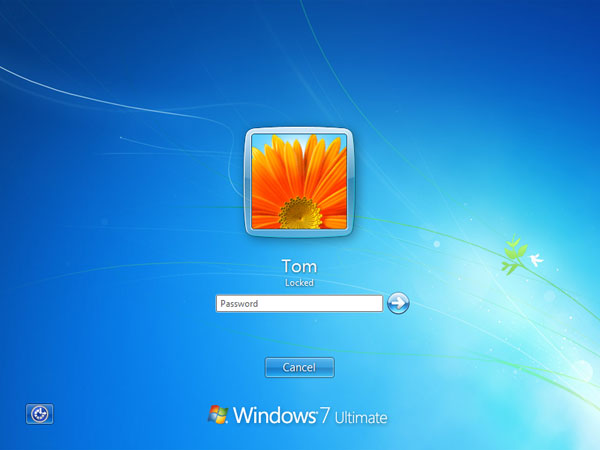
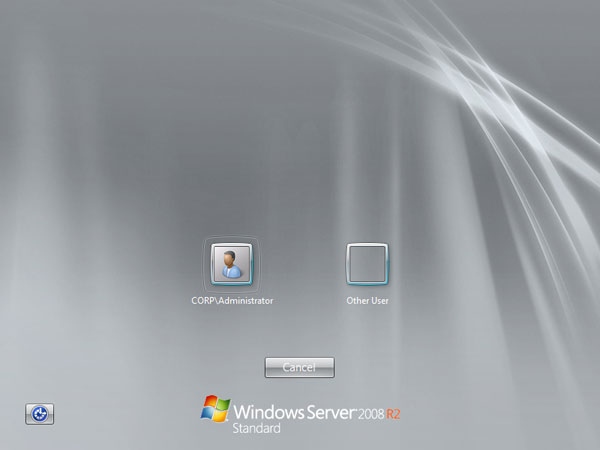
- Instead of showing icons for all the users with accounts on the PC, it now only shows two icons. The first icon is the last user who logged on and the second icon always shows “Other User”. Click Other User.
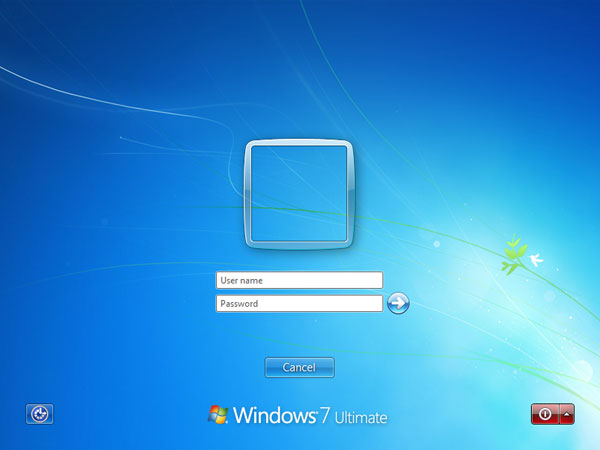
- After you click “Other User”, the system moves on to the normal login screen where it prompts for user name and password.
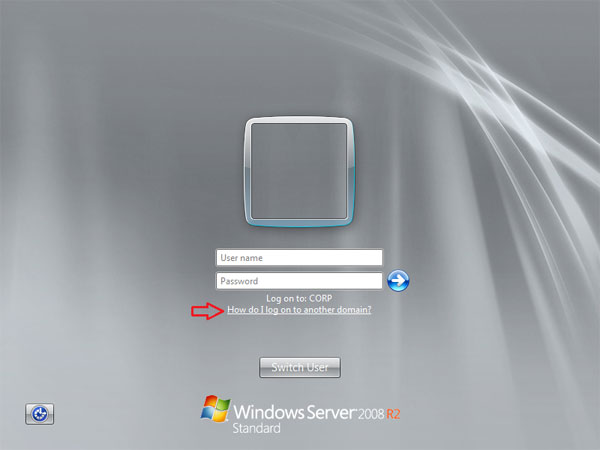
- In order to log on to a local account, you had to find out your computer name. In my example, CORP is the domain I’ve joined to, and my computer name is WIN_S5Q8DVT3E58. If you don’t remember your computer name, please click on the link “How to log on to another domain” on your screen, and it will display your computer name.
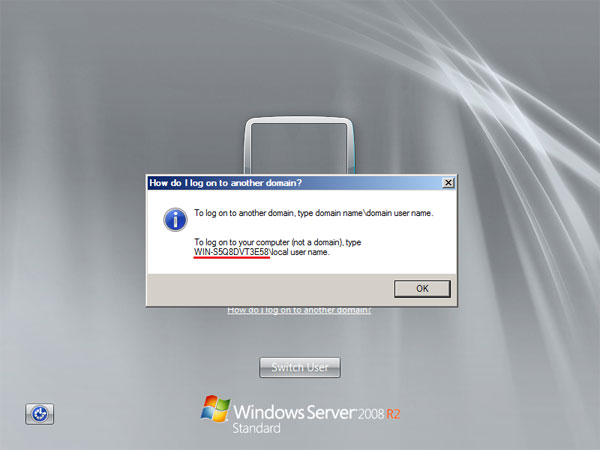
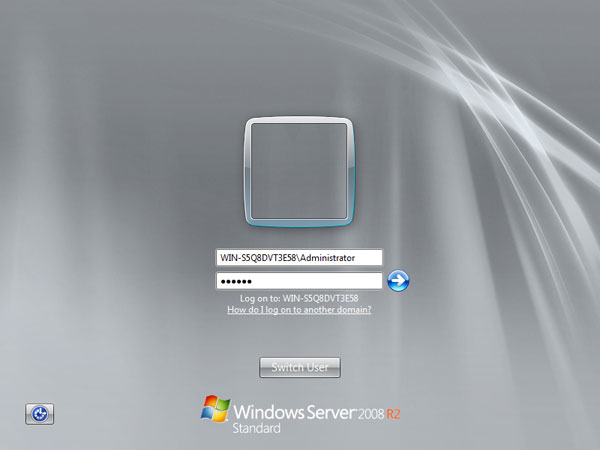
- Now type the name of your computer, a backslash (\), and the user name for the local account that you want to log on to. For example: computer_name\user_name.
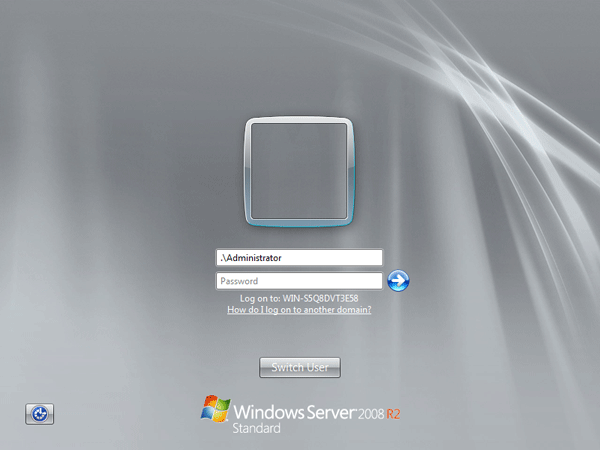
However, most of the time we use some complex computer names that are too difficult to remember, and it’s also a waste of time to type in the computer name.
Luckily there is an easier way to log on to a local account without typing your computer name. If you type in .\ before the username, that will instruct it that you are logging onto the local computer. For example, to log on as local administrator, just type .\Administrator in the User name box. The dot is an alias that Windows recognizes as the local computer.
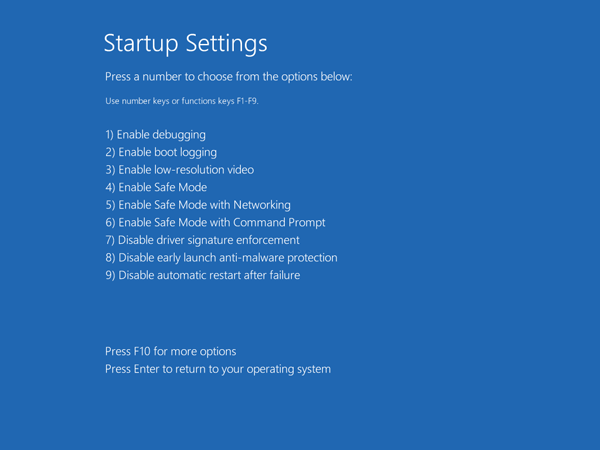
Note: If you want to log on locally on a domain controller, you need to start your computer in Directory Services Restore Mode (DSRM).