UAC (User Access Control) is a security feature introduced since Windows Vista, which helps prevent unauthorized changes to your computer. When you try to install a program or make changes to Windows settings, the UAC prompt will show up asking for your approval, even though you are already logged on as an administrator.
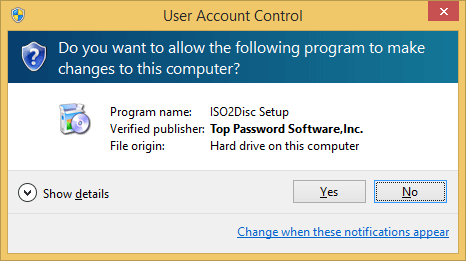
If the changes are not approved by the administrator, they are not executed and Windows remains unchanged. It is as if nothing happened. However, most of the windows users simply keep it disabled as you have to bear the pop-up and press Yes every time you run an application. Here’s how to disable UAC in Windows 8 and 10.
How to Disable UAC in Windows 8 and 10?
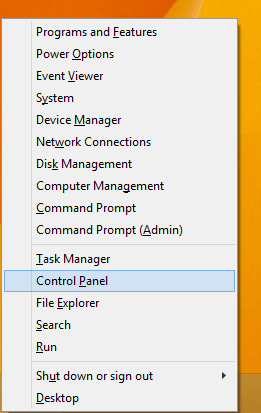
- Press the Windows key + X to open the power user menu, and then select Control Panel from the list.
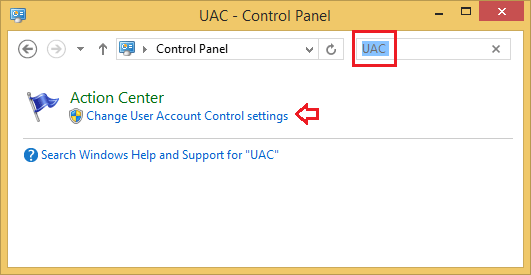
- Once Control Panel is launched, type UAC in the search box in the upper right corner of the window. Click Change User Account Control settings in the search results.
- Use the vertical slider to select the desired UAC security level. To turn off UAC entirely, drag the slider down to Never notify, and click OK.
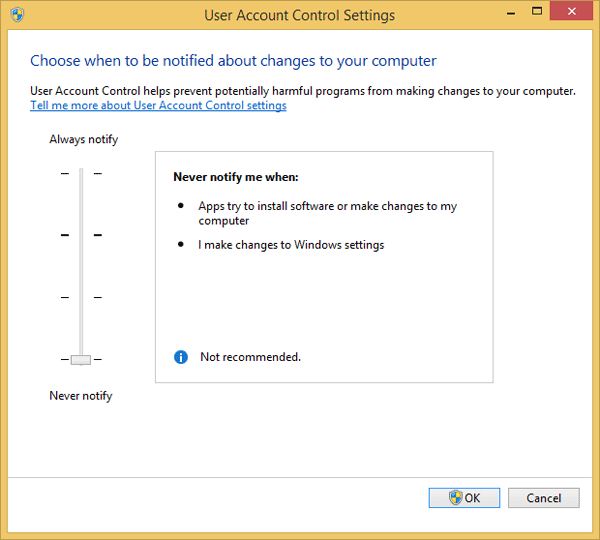
You need to reboot the computer before it takes effect.