Posts Tagged ‘windows 8’

How to Create a Virtual Hard Drive (VHD) in Windows 11/10/8/7

October 8th, 2012 by Admin

Have you ever wished you had an extra hard drive or partition to setup a dual-boot or multi-boot operating system? You can shrink your existing partition to create a new partition but it always carries some risk of data loss. Beginning with Windows 7, you can create a virtual hard drive (VHD) which acts as a separate hard drive in your computer.

The virtual hard drive (VHD) is stored as a .vhd or .vhdx file on your physical disk. By mounting a virtual hard drive, you can easily copy files to and from the virtual disk. Additionally, Windows 11/10/8/7 can be configured to boot from a VHD. In this tutorial we’ll go through the steps of creating a virtual hard drive (VHD) in Windows 11/10/8/7.

How to Create a Virtual Hard Drive (VHD) in Windows 11/10/8/7?

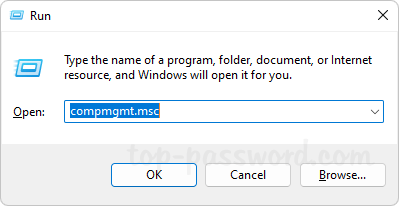
  1. Press the Windows + R key combination to bring up a Run box, type compmgmt.msc and hit Enter.

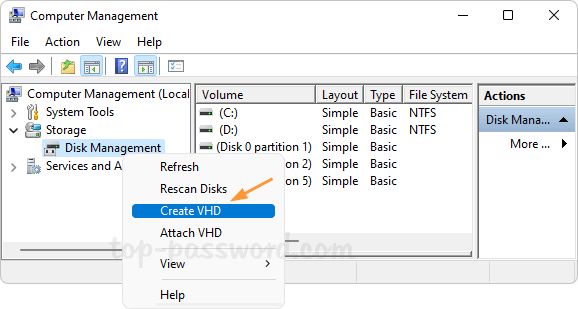
  2. The Computer Management dialog opens, click Disk Management in the left pane of the window and wait until you see all currently installed disks in the right pane.
  3. Right-click Disk Management and then select Create VHD.

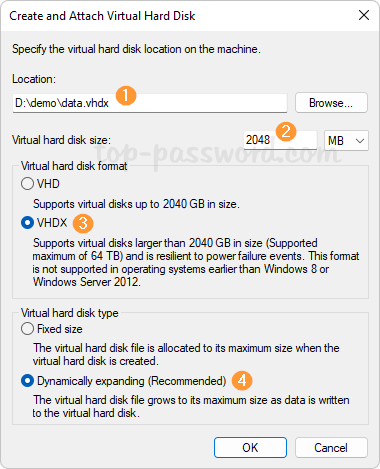
  4. Click Browse to choose the location where you want your VHD stored, and give it a descriptive name. Choose the size you want it to be, and select dynamic or a fixed. If you want the disk to expand in size as you add files to it, then pick Dynamically expanding. Check Fixed size if you want a specific size and for it to stay that way. Click OK.

  5. You will see the virtual hard drive listed as unallocated space in Disk Management. Right click on the virtual hard drive (Disk 1) and select Initialize Disk.

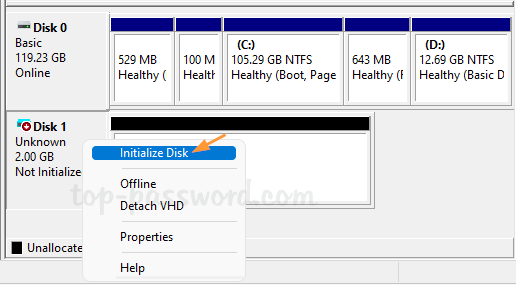
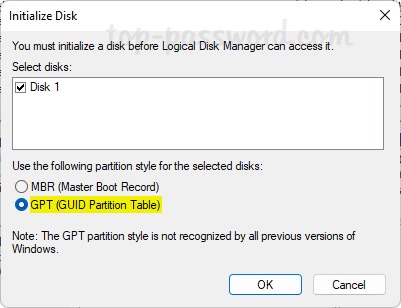
  6. Press OK in the Initialize Disk box.

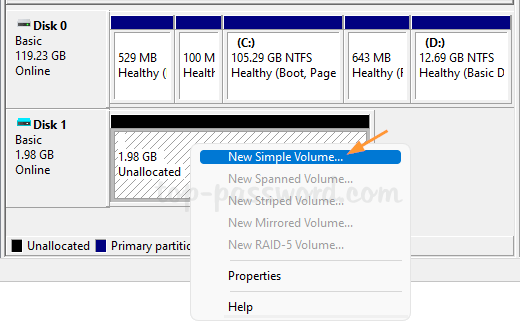
  7. Now it is time to create a volume by right-clicking the unallocated space and select New Simple Volume.

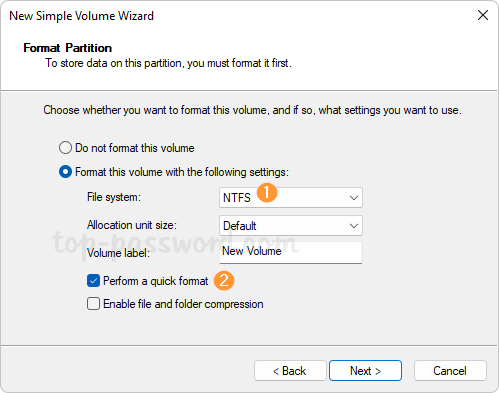
  8. The New Simple Volume Wizard starts up and just press Next until the wizard is complete.

  9. Now the new virtual disk is ready to be used, just like any other disk. You can see the virtual hard drive on your computer.

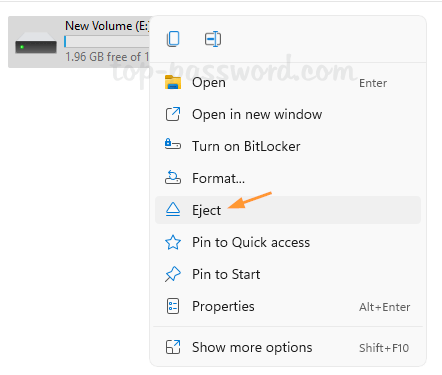
    Windows will automatically dismount the virtual hard drive after a restart. You can also manually dismount the drive by right-clicking it in File Explorer and selecting Eject.

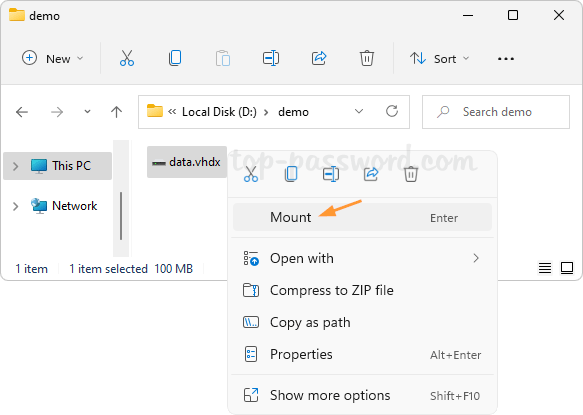
  10. Whenever you need to mount a vhd/vhdx file as a virtual hard disk, just right-click it in File Explorer and choose Mount.

How to Dual Boot Windows 8 and Windows 7

October 7th, 2012 by Admin

Want to install Windows 8 and explore the new features but don’t want to overwrite your current Windows setup? You can easily create a dual boot setup of Windows 8 along with your current Windows 7 or Vista system.

Note: Since the boot manager of Windows 7/Vista is not well compatible with Windows 8, please make sure that you install 7/Vista before installing Windows 8. If you install Windows 8 first and then install the old versions of Windows, the Windows 8 boot menu will be lost in the dual-boot menu and you won’t be able to boot into Windows 8 anymore.

How to Dual Boot Windows 8 and Windows 7?

Follow this guide to configure your Windows 7 or Vista system to dual-boot Windows 8. The whole procedure can be divided into 3 steps: Create a new partition, Install Windows 8 and optionally set default boot operating system.

Step 1: Create A New Partition

You need to create a new partition of at least 16GB ( 20GB for 64-bit Windows 8 ) for your Windows 8 installation. If there is already a free partition up to the requirement, just skip this step. Otherwise you need to shrink the existing partition to create unallocated disk space, from which you create a new partition during the installation of Windows 8.

  1. Open the Start Menu and right click on the Computer option. Click Manage, and in the window that appears, click on Disk Management in the left sidebar.
  2. Right-click the volume you want to shrink, and then click Shrink Volume.
  3. Shrink it down so you have at least 16GB of space left on the end of the drive, and click OK.

Step 2: Install Windows 8

Create a Windows 8 installation disk, boot from it and start the Windows 8 setup. Follow this step-by-step guide: How To Install Windows 8 from USB Flash Drive.

For a dual-boot setup, the steps are the same as in that guide. The only difference is that when you are asked to select where to install Windows 8, select the partition that you created and make sure you don’t select the partitions where other operating systems are installed.

Step 3: Set Default Boot Operating System

When the installation is complete, Windows Setup will reboot your system and you will then see the new Windows 8 style dual boot screen shown as follow.

As you can see, Windows 8 is set as your default boot operating system.If you plan to use it as a secondary operating system and change the default boot operating system, you can click the Change defaults or choose other options at the bottom of the boot screen.

How to Enable or Disable Fast Startup in Windows 8

August 8th, 2012 by Admin

Here is complete step-by-step tutorial about how to enable or disable Fast Startup in Windows 8. One of the most attractive features that Microsoft has provided in its newly built Windows 8 OS is the speed at which it starts and shuts the system down. Yup…in a single blink of eyes, you will find that the system has been restarted. The reason behind this is the fact that Windows 8 does not shut down completely. In fact, it saves the current state of your system to disk so that it can resume quickly, the next time you start your Windows 8 PC.

However, there are people who prefer to start their system completely fresh on restarting or rebooting, then this tutorial is definitely for them. The tutorial will let you learn how to disable “Fast Startup” in Windows 8. Well, let me clear it out, you can then enable it, in case you do not like the Windows 8 restarting like the prior versions of Windows. Now, let’s get started with the step-by-step tutorial on how to enable or disable “Fast Startup” in Windows 8 below:

How To Enable Or Disable Fast Startup In Windows 8:

  1. Right click on Desktop and select Personalize.

  2. Click on Display in the right pane.
  3. Then click on Adjust brightness in Display window.
  4. Then click on Choose what the power buttons do.
  5. Now in the System Settings window, click Change settings that are currently unavailable.

  6. Finally look for Turn on fast start up, it should be checked by default. Uncheck if you do not want Windows to have fast start up. That’s it.

You’re done! To perform the above operation, you need to log on your computer as administrator.

How to Show Computer Icon on Windows 8 Desktop

July 31st, 2012 by Admin

When you perform a clean install of Windows 7 or Windows 8, Windows doesn’t show Computer icon on the desktop by default. Users need to manually add the icon to the desktop.

In Windows 7 and previous Windows versions, adding the Computer icon to the desktop is a simple task. Open the Start menu, right-click on Computer, and click Show on desktop option to show Computer icon on the desktop. But how to place the Computer icon on desktop in Windows 8? As you know, Start menu doesn’t exist in Windows 8 and has been replaced with Metro-style Start screen. So, users can’t add Computer icon from the Start menu.

Windows 8 users who would like to see Computer icon on the desktop can follow the given below steps.

Step 1: Right-click on desktop and select Personalize to open Personalization window.

Step 2: In the left-pane of Personalization window, click on Change desktop icons. This will open Desktop Icon Settings.

Step 3: Here, under Desktop icons section, tick Computer checkbox and then click Apply button to show the Computer icon on the desktop. You can also show/hide Recycle Bin, Network, and Control Panel icons on the desktop from here. You are done!

The default icons Computer, Network, Recycle Bin and Control Panel can be replaced with a custom one by selecting the icon and then clicking on Change Icon button.

Log on to Windows 8 with Windows Live ID

July 15th, 2012 by Admin

One of the new features in Windows 8 that I’m particularly intrigued by is the ability to log on to the PC with a Windows Live ID instead of a more traditional local user account. On the Building Windows 8 Blog, Microsoft group program manager Katie Frigon tackles this new feature and provides some interesting context.

“In Windows 8, we have set out to ensure that each PC user has a truly personal experience that seamlessly bridges their online and offline tasks, is simpler to set up and use, and persists across their set of Windows 8 PCs,” she writes in the blog post.” To do this, we’ve introduced the ability to log in to Windows (optionally) with a Windows Live ID that works across devices, apps, and services, allowing you a uniquely personal experience with Windows.”

Using a Windows Live ID style logon is optional and is in fact not available during Setup if your PC isn’t connected to the Internet. In this article we’ll show you how to set up a Windows Live ID logon option so you can log on to Windows 8 with Windows Live ID.

How to Set Up Windows Live ID Logon in Windows 8:

  1. From the Metro UI, click or swipe the upper right corner of the screen to show the Charms menu. Click or tap on the More PC settings link.

  2. Select Users. Then click/tap on “Switch to a Microsoft account”.

  3. Type in your local account password.

  4. And then enter your Live ID or your Hotmail account. If you don’t have one already, you can create one by clicking the link “Sign up for a new email address”.

  5. Answer the security question to confirm your identity. You may receive an SMS message from your mobile phone that shows “Security info was added for xxx”.

  6. Click on Finish. You’ve completed the setup procedure.

Next time you start your computer, you can log on to Windows 8 with Windows Live ID. After logging in, some of your Metro apps will show data e.g. email, photos, and documents associated with your Windows Live ID account.

How to Show My Computer Icon on Windows 8 Desktop

June 22nd, 2012 by Admin

The latest Windows 8 is having a new Metro UI desktop and the older version of desktop also, but My Computer icon is missing on it. In earlier Operating Systems like Windows 7 or Windows Vista you can go to start menu and select ‘Show on Desktop’ option for My Computer. But, Windows 8 is missing the normal start menu also by default, so you don’t have option to select ‘Show on Desktop’ anymore. Here is the simple way on how to show my computer on desktop in Windows 8.

This will really make the life easy for accessing disk drives, computer management, device manager and properties in Windows 8.

How to Show My Computer Icon on Windows 8 Desktop

  1. Click on the Desktop in Metro UI (as shown below). This will bring the normal old desktop.
  2. Right Click on the blank space in desktop, select Personalize.
  3. In next screen Click on Change desktop icons. Here you can select the icons wanted to display in Windows 8 desktop. Select the tick box for Computer. Control Panel and Network icons also can be displayed on Windows 8 desktop by this method.

That’s it. Now you should have My computer icon on the desktop.

How to Automatically Logon to Windows 8?

February 7th, 2012 by Admin

Personally, I find the feature of Windows 8 allowing users to disable the logon screen, as it was in prior versions. When you enter the password on the logon screen, it takes some time to load windows explorer and all startup programs. This can also be quite annoying and time consuming. So what is the solution?

There should be a way to automatically logon to Windows 8, so that when you hit the Power button and return a few minutes later, you won’t need to enter your password and then wait for all those startup programs to load. let us see how.

Automatically logging into Windows 8:

1. Press Win + R to open the Run command, type netplwiz and press Enter.

2. Under the Users tab, uncheck the Users must enter a user name and password to use this computer option, click Ok.

3. Now enter the password in Automatically Log On dialog window, click Ok, restart your Computer.

You won’t be prompted to enter your password again during login and no lock screen appears either.

Windows 8 now allows you to sign in via a picture password

January 10th, 2012 by Admin

Microsoft recently revealed yet another new feature of Windows 8 in a new Building Windows 8 blog post. This time, we learn about signing in via a picture password. Microsoft claims that this method of signing in is secure and also a lot of fun to use.

“The experience of signing in to your PC with touch has traditionally been a cumbersome one. In a world with increasingly strict password requirements—with numbers, symbols, and capitalization—it can take upwards of 30 seconds to enter a long, complex password on a touch keyboard. We have a strong belief that your experience with Windows 8 should be both fast and fluid, and that starts when you sign in,” Microsoft stated in an official Building Windows 8 blog post.

The new picture password feature is comprised of two parts. First, it utilizes a picture of your choice. Second, there are a set of gestures that you can draw upon it. Microsoft has made it to where you can upload a personal picture rather than use a canned set of Microsoft images, to personalize the experience. As Microsoft puts it, “it increases both the security and the memorability of the password.” Microsoft relates this experience with one’s lock screen on their smartphone.

“At its core, the picture password feature is designed to highlight the parts of an image that are important to you, and it requires a set of gestures that allow you to accomplish this quickly and confidently,” Microsoft stated.

Microsoft also stated that this new picture password feature is optional and not a replacement to the traditional text password. “To be clear, picture password is provided as a login mechanism in addition to your text password, not as a replacement for it. You should be sure to have a good hint and use safeguarding mechanisms for your text password, which you can still always use to sign in,” Microsoft emphasizes.

Forgot Windows 8 picture password? You can also find the way to reset Windows 8 picture password when you forgot it.