Provide the best software to recover passwords for
Windows, SQL Server, PDF, Word, Excel, Outlook, FTP, Email, etc.


Enable or Disable Windows Boot Manager Screen in Windows 10
How to bypass or remove the Windows Boot Manager screen at startup? Every time your computer boots up, the Windows Boot Manager screen might keep coming up and ask you to choose which operating system to start.

Though this screen could also give you opportunity to press F8 to access Advanced Boot Options, it can unnecessarily slow down the boot process especially when you have only one OS installed. In this tutorial we'll show you the easy way to enable or disable Windows Boot Manager screen in Windows 10.
How to Enable or Disable Windows Boot Manager Screen in Windows 10
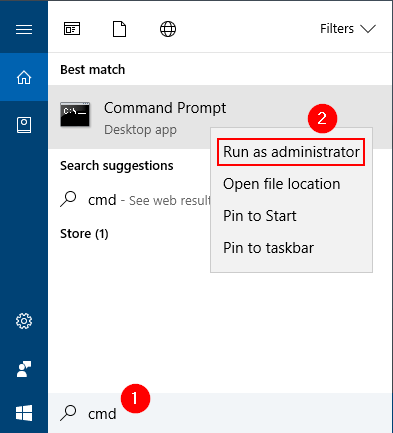
To start, you have to open an elevated Command Prompt. Just click the Cortana Search box in the Windows 10 taskbar and type cmd. You'll see the Command Prompt appear at the top of the list. Right-click on it and select Run as administrator.
In order to enable the Windows Boot Manager screen, type the following commands at the Command Prompt that pops up, and press Enter.
bcdedit /set {bootmgr} displaybootmenu yes
bcdedit /set {bootmgr} timeout 30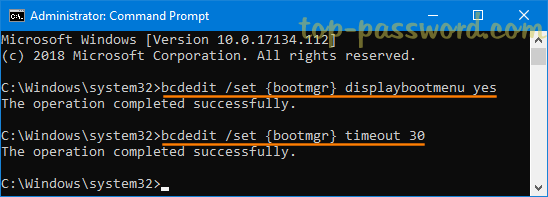
The second command lets you set the time (0 - 999 seconds) the Windows Boot Manager will wait on the screen before automatically booting into the default OS.
- When done, close Command Prompt. Every time your computer starts, the Windows Boot Manager screen will pop up and wait for you to choose which operating system you want to start.
If you decide to remove or disable the Windows Boot Manager screen, just open the Command Prompt as administrator and run this command:
bcdedit /deletevalue {bootmgr} displaybootmenu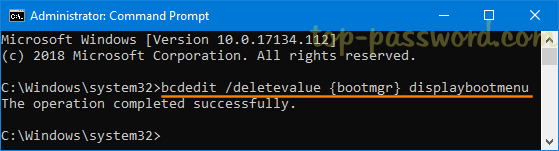
Note that you must be signed in as an administrator to be able to enable or disable Windows Boot Manager screen in Windows 10. If you're having trouble logging into your computer, you can create a new admin account with PCUnlocker before taking the steps above.
Related Articles