2 Methods to Create a UEFI Bootable Ubuntu USB Drive in Windows
Can I install Ubuntu with UEFI mode? How to create UEFI-only bootable USB drive from Ubuntu ISO image? Ubuntu supports x64 UEFI for 64-bit builds, starting with 10.10. We recommend using Ubuntu 12.04 LTS 64-bit or higher. In this tutorial we'll show you 2 simple ways to create a UEFI bootable Ubuntu USB drive in Windows 10, 8 and 7.
Requirements:
- 64-bit (AMD64) desktop image of Ubuntu 12.0.4 LTS or higher
- A USB flash drive (at least 2GB is recommended)
- ISO2Disc or Win32 Disk Imager
Method 1: Create UEFI Bootable Ubuntu USB Drive Using ISO2Disc
ISO2Disc is a lightweight yet powerful freeware designed to create bootable CD or USB drive from ISO image. Just grab a copy of Ubuntu ISO file and you can simply create a UEFI bootable USB drive.
- Download the freeware ISO2Disc and install it on your Windows-based computer.
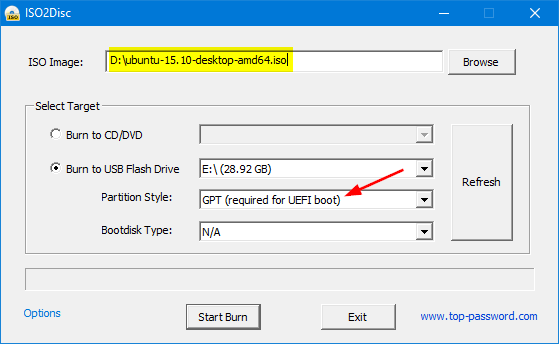
- Start the ISO2Disc application, then click the Browse button to locate the Ubuntu ISO file you've downloaded.
Click the "Burn to USB Flash Drive" option, choose the USB drive attached to your computer, and then select "GPT (required for UEFI boot)" partition style.

- Click Start Burn. Wait for the burning process to be completed.
Method 2: Create UEFI Bootable Ubuntu USB Drive Using Win32 Disk Imager
Win32 Disk Imager is a simple disk imaging utility to write .IMG files to SD and USB cards and allow booting from these devices. Here's how to use it to create a UEFI bootable Ubuntu USB drive:
- Download the Win32 Disk Imager utility from the Sourceforge Project page as an installer file, and run it to install the software.
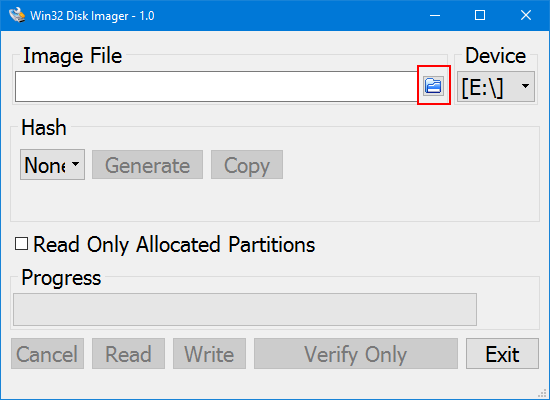
After running the Win32 Disk Imager utility, click the blue folder icon in the top-right corner to browse for a disk image.

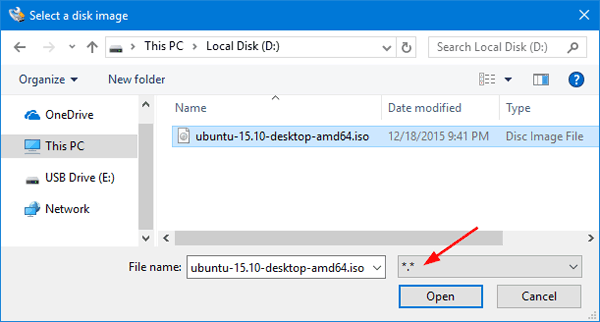
In the file type drop-down list, select *.* so you can see all files, regardless of file extension. Locate your Ubuntu ISO file and then click Open.

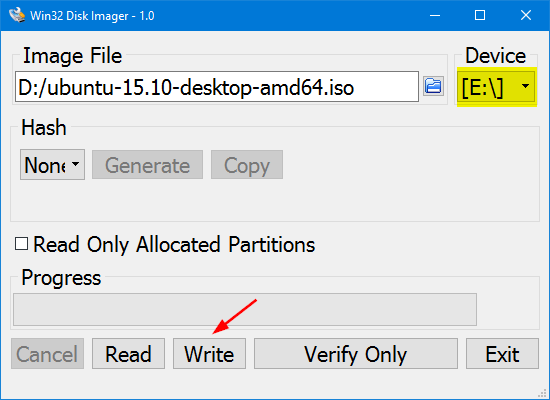
From the Device drop-down list, select the device drive of your USB flash drive.

- Click Write, then wait for the write process to finish.


