Windows 10 comes with lots of animation effects to give you a more attractive and user-friendly feel, such as fading effects, when you maximize/minimize a window or open/close a menu. If you find these animations slow down your computer or you don’t like them at all, here are 3 ways to turn off visual animations in Windows 10 to boost performance.
Method 1: Turn off Visual Animations Using the Settings App
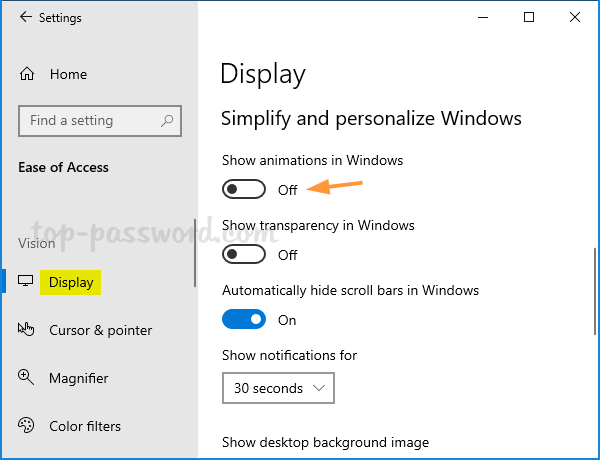
- Use the Windows key + I keyboard shortcut to open the Settings app, and then click on Ease of Access.

- From the left pane, select the Display category. In the right-side pane, slide the “Show animations in Windows” button to the left to disable the animations altogether.
Method 2: Turn off Visual Animations Using Control Panel
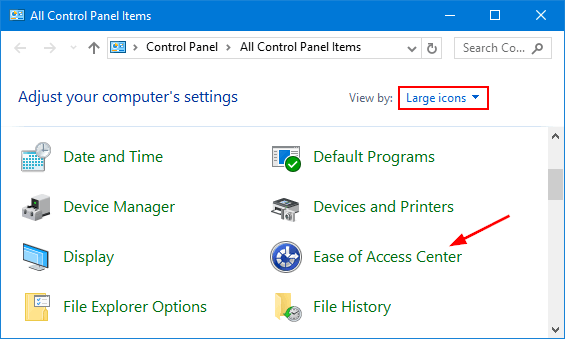
- Open the Control Panel with Large icons view, and click on Ease of Access Center.
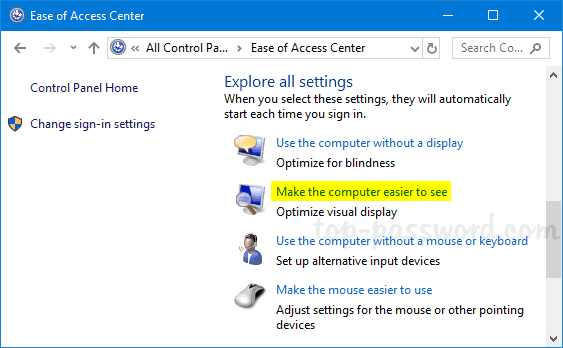
- Scroll down to the “Explore all settings” section, click on “Make the computer easier to see“.
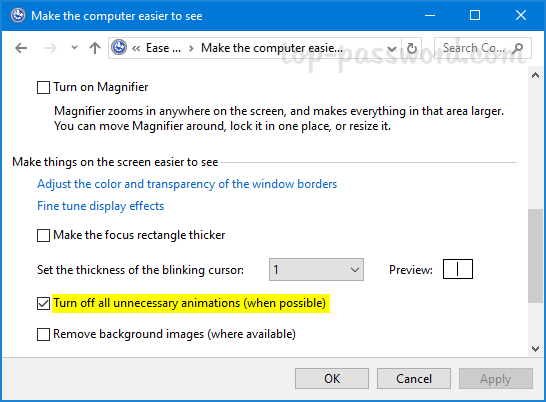
- Check the option “Turn off all unnecessary animations (when possible)” and click OK.
Method 3: Turn off Visual Animations Using System Properties
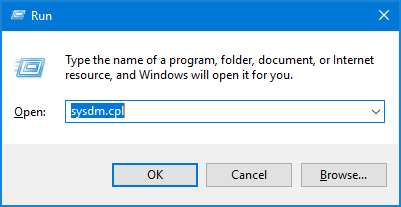
- Use the Windows key + R keyboard shortcut to open the Run dialog, type sysdm.cpl and hit Enter to open the System Properties window.
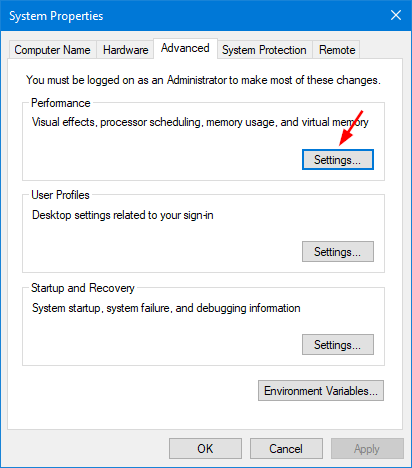
- Select the Advanced tab. Click on the Settings button under the Performance section.
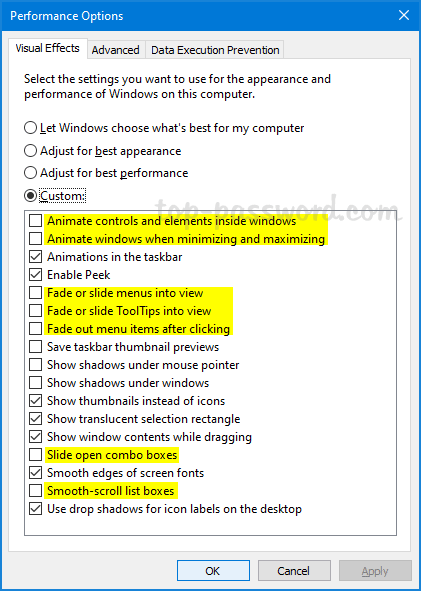
- In the Performance Options dialog, you’ll see a long list of checkbox options which let you tweak your system’s visual effects. To disable animations, we recommend unchecking the following options:
- Animate controls and elements inside windows
- Animate windows when minimizing and maximizing
- Fade or slide menus into view
- Fade or slide ToolTips into view
- Fade out menu items after clicking
- Slide open combo boxes
- Smooth-scroll list boxes
- When done, click OK and then Apply to make the changes take effect.