Windows To Go is a new feature introduced since Windows 8, which allows you to install and run Windows 8 from a USB drive. It’s officially available only for Enterprise edition of Windows 8, but using the freeware ISO2Disc you can create a Windows To Go USB drive with any edition of Windows 8, 8.1 or 10.
Requirements:
- A USB thumb drive (USB 3.0 is preferrable) or external USB hard drive with at least 16GB of space.
- Windows 8, 8.1 or Windows 10 ISO image
- The free ISO burning tool: ISO2Disc
How to Create A Windows To Go USB Drive?
- Click here to download the latest version of ISO2Disc and install it on your computer.
- Plug the USB drive into your PC. Note the steps below will wipe out the entire USB drive, including all partitions! If there is important data, backup now before continuing.
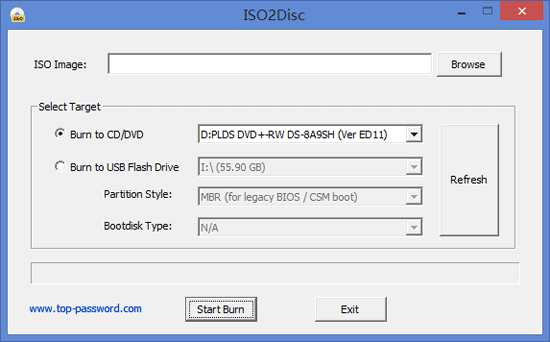
- Launch the ISO2Disc application. Click on Browse to select your Windows 8/8.1/10 ISO image.
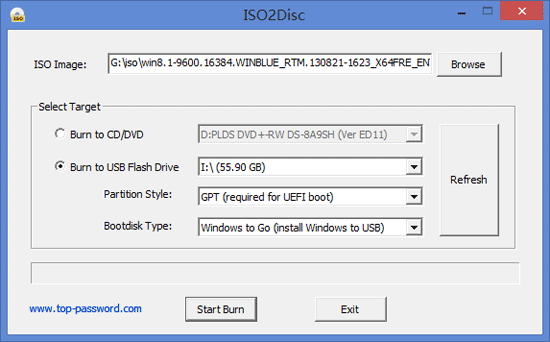
- Click on Burn to USB Flash Drive and then select your attached USB drive. Make sure the correct USB drive is selected (any content on the USB drive will be wiped during the creation process so this is a vital step).
- If you’re going to use the Windows To Go drive with GPT partition scheme, select “GPT (required for UEFI boot)“. MBR partition scheme should be selected if your target PC can boot in Legacy BIOS or CSM mode only.
- Under the Bootdisk Type, there are two options: Create Windows installation USB and Windows to Go (install Windows to USB). Select the second option as we need to make a Windows To Go USB drive.
- Click on Start Burn, you’ll see “Your USB drive will be erased” warning. Click OK to prepare the Windows To Go USB drive.
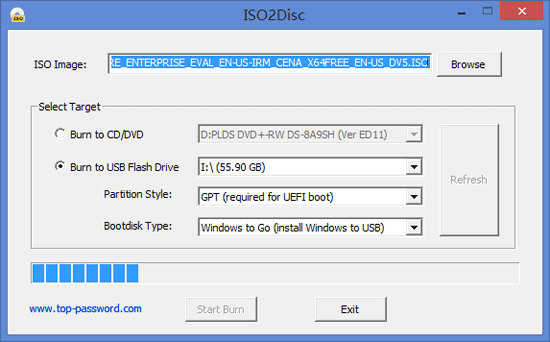
This is the longest part so be patient. The process only took 15 minutes for me, even though I used an external hard drive with a slower USB 2.0 connection. But it could take more than one hour if a USB 2.0 thumb drive is used.
- Once you’ve created a Windows To Go USB drive, you can bring it to boot up any computers. The first time you boot from a Windows To Go USB drive, you’ll have to go through the same first-time setup process you’d see after installing Windows on a computer normally. That’s it!