When you roll the mouse wheel one notch, a webpage or a document will be scrolled up or down 3 lines. If this default scroll speed is too slow for you, you can increase the mouse wheel scrolling speed in Windows 10 and make it scroll one screen at a time.
How to Set Mouse Wheel to Scroll One Screen at A Time in Windows 10?
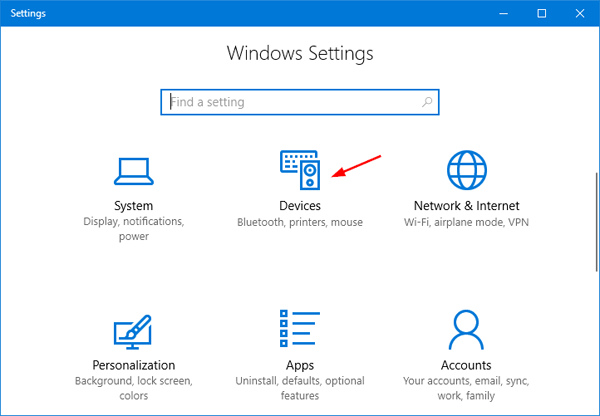
- To change mouse wheel scroll speed, you need to access the Settings app. To do so, click the Settings icon from Windows 10 Start Menu, or press the Windows + I keyboard shortcut to open the app.

- When the Settings app launches, click on Devices.
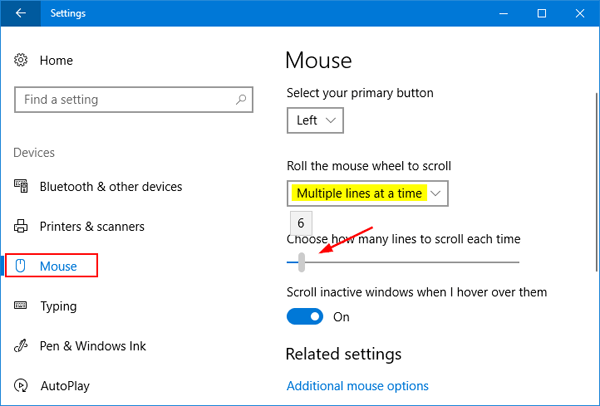
- Choose Mouse on the left, you’ll see various mouse configuration settings. Under the “Roll the mouse wheel to scroll” setting, you can choose between “Multiple lines at a time” or “One screen at a time“. The first is the default setting, which makes scrolling smoother and slower.
- If you choose the “Multiple lines at a time” option, you can use the slider underneath to choose the number of lines that are moved up/down with each notch of the wheel.
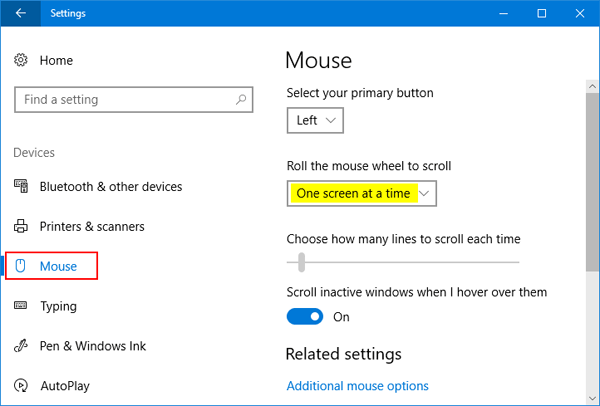
- If you choose the “One screen at a time” option, the slider below will gray out and when I roll the mouse wheel one click, the wheel will skip an entire page of content at once, rather than going through it line by line. This setting is drastic if you have a large monitor with a high resolution.
After changing the mouse wheel scroll settings, you can open a webpage or a document, and check which scrolling method you prefer, and adjust the scroll speed to what you want.