Is there a way to restrict switching from Microsoft account to local account? If you’ve set up a child account in Windows 10, switching to a local account will put Family Safety in an unworkable condition, and parents couldn’t monitor the kids’ accounts any longer. So we come up with a method to block switching from Microsoft account to local account in Windows 10.
Notes: This method works with Windows 10 only. It won’t block you switching from local account to Microsoft account and you can still create a new local/Microsoft account.
Block Switching from Microsoft Account to Local Account in Windows 10
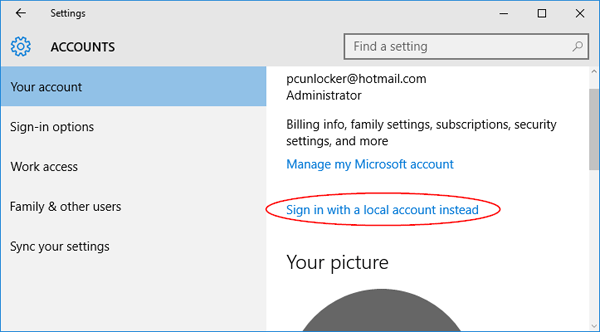
This method works by renaming a system file named UserAccountBroker.exe. After renaming, go to PC Settings -> Accounts -> Your account, click on the “Sign in with a local account instead” link and you’ll get no response.
In Windows 10, most system files have TrustedInstaller as owner. If you want to modify, rename or delete a system file, you have to take ownership and grant full access permission to your current logged on account. Here’s how to take ownership of UserAccountBroker.exe and rename it:
- Download and install the freeware TakeOwnershipPro. After installing, the program will add the “TakeOwnershipPro” shortcut to Windows Explorer’s right-click context menu.
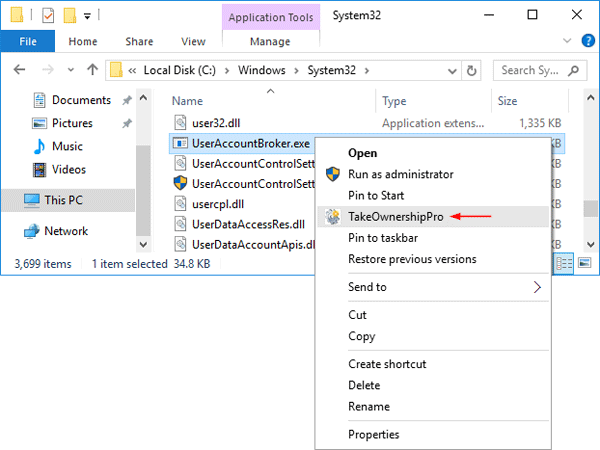
- Open File Explorer, navigate to the C:\Windows\System32 directory. Right-click on the UserAccountBroker.exe file, and then select “TakeOwnershipPro” from the context menu.
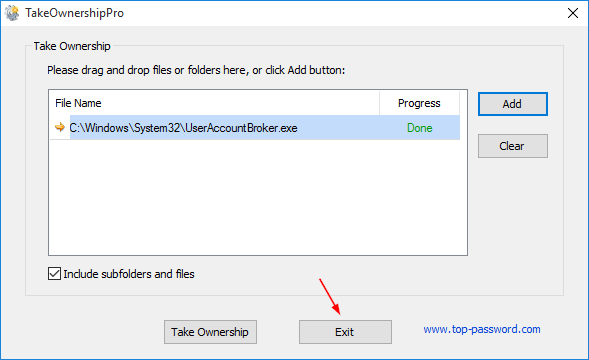
- You’ll see a pop-up window showing the process of taking ownership is complete. Click Exit to close it.
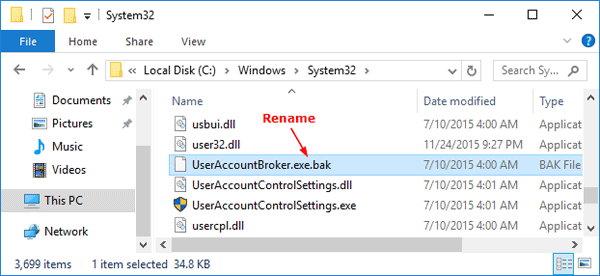
- Next rename the UserAccountBroker.exe file by by adding a .bak extension. If you’re running 64-bit version of Windows 10, you also need to rename another copy of UserAccountBroker.exe under the C:\Windows\SysWOW64 directory.
- Now you’ll be unable to switch from a Microsoft account to a local account from PC Settings charm. If you want to convert back to a local account later, you have to rename the UserAccountBroker.exe.bak file by removing the .bak extension. That’s it!