Do you need remote access to your home or work computer? Remote Desktop Connection is a nice feature included with every Windows installation, which makes it easy to access your computer remotely from another computer. By default, Remote Desktop is disabled for security reasons. In this tutorial we’ll show you how to set up and use Remote Desktop Connection in Windows 10.
Part 1: Turn On Remote Desktop Connection in Windows 10
In order to set up Remote Desktop Connection, follow these step-by-step instructions:
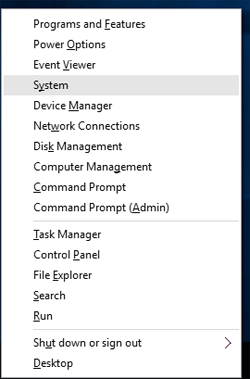
- Press the Windows key + X to open the Quick Access menu. Click System from the menu that pops up.
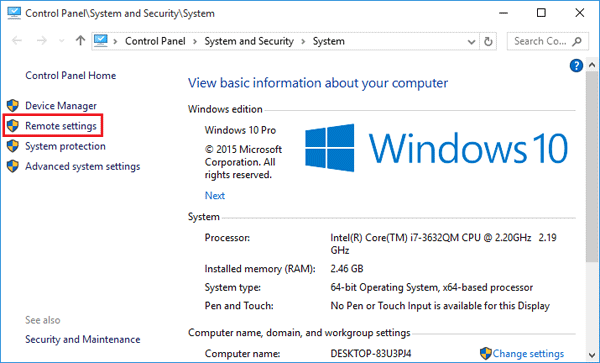
- The next window will show you all of the basic specifications of your computer such as model number, CPU configuration, installed memory, etc. Click on the “Remote settings” link on the left pane.
- Tick the “Allow remote connections to this computer” checkbox.
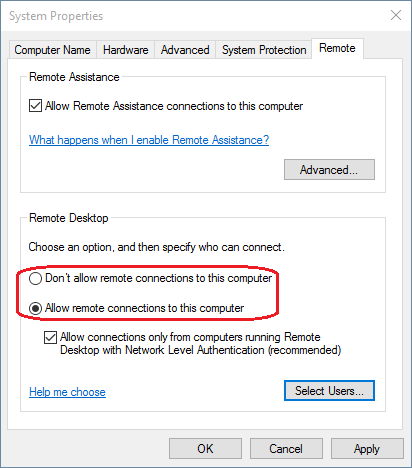
If you’ll be connecting to this computer from a system that’s running any version of Windows older than Windows 7, then do not check the “Allow connections only from computers running Remote Desktop with Network Level Authentication” checkbox.
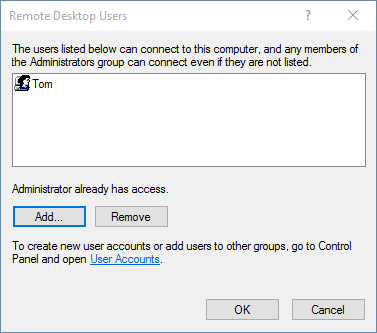
- To grant Remote Desktop access permissions to a user account, click on “Select Users” on the bottom right of the window. This opens the Remote Desktop Users dialog box. Click on Add button to add your user account to the list.
Note: Remote desktop does not allow a user with a blank password to logon, so make sure your user account is password protected.
- Once this is done, you will now be able to connect to this computer using the Remote Desktop Connection.
Part 2: Connect to Your PC Remotely
Now you can connect to your computer from another Windows PC, by following these steps:
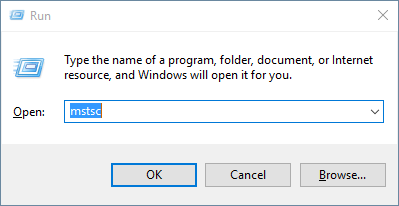
- Press the Windows key + R to open the Run box. Type mstsc and hit Enter.
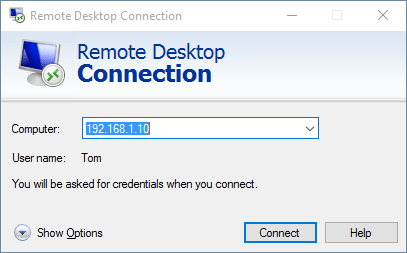
- A Remote Desktop Connection dialog box will pop up now. In this box type your computer’s IP address and click Connect.
- You will be prompted to enter the login credentials of the Windows account you’ve granted Remote Desktop access to. Click OK and Windows Firewall may give you a warning. Just ignore it and click Yes and your remote connection session will start.