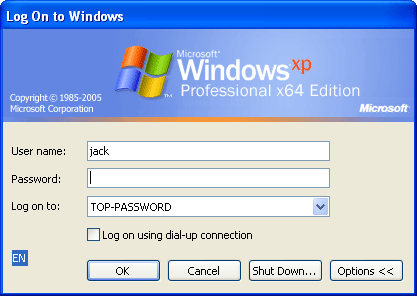
Locked out of Windows XP domain machine and can’t log into the domain user account? Need to gain access to your computer after the domain controller is no longer available or you forgot the password?
In this article we’ll explain how to reset forgotten Windows XP password and then remove your computer from a domain that no longer exists, or which you no longer have access.
Part 1: Reset Forgotten Windows XP Password
Before removing your computer from the domain you need to first log in as a local administrator. If you’ve forgotten your password, you can reset it easily with the PCUnlocker program. Here’s how:
- Use a spare PC to download the PCUnlocker ISO image and burn it to a CD or USB flash drive using the ISO2Disc program.
- Boot your locked Windows XP machine from PCUnlocker Live CD/USB drive.
- Once the PCUnlocker program starts, you can see a list of local accounts for your Windows XP system.
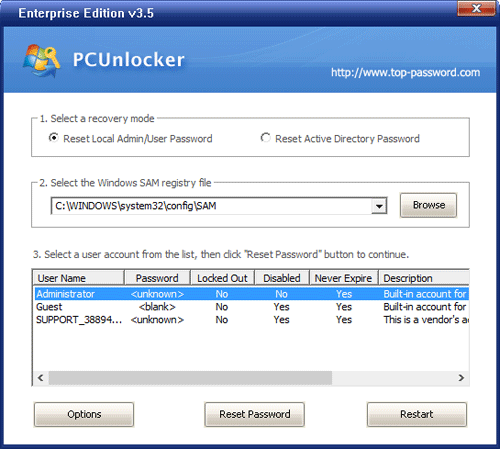
- Choose the built-in Administrator account and click on Reset Password button. It will remove the local administrator password immediately.
Part 2: Remove Windows XP from Domain
Once you’ve reset the local administrator password, you can then log on your computer locally and remove Windows XP from a non-existent domain, by following the steps below:
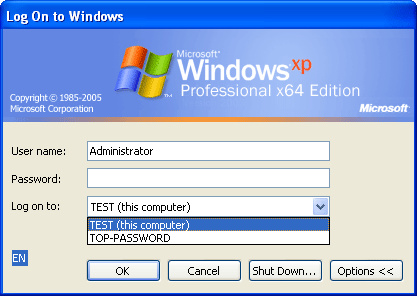
- Boot your Windows XP machine as usual. When you get to the Welcome screen, press Ctrl + Alt + Del twice to get the classic Windows logon box.
- Type Administrator in User name box, and leave the password box empty as you’ve reset the local administrator password. Make sure that in the Log on to field, you have pulled down to “this computer” rather than a domain. Click OK and you should be able to log on successfully.
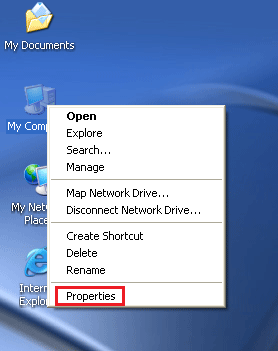
- After getting into Windows XP, right-click the My Computer icon on your desktop and select Properties.
- In the System Properties window, go to the Computer Name tab and click the Change button.
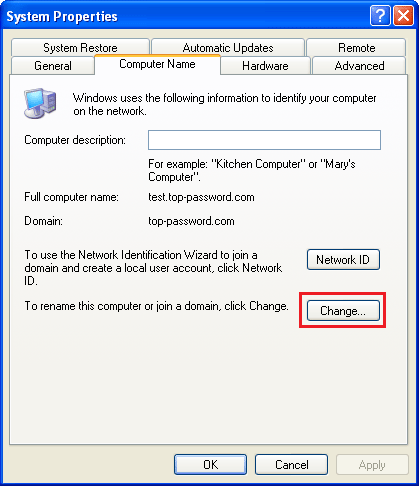
- In the Member of section, choose Workgroup and then type something, anything in the Workgroup field.

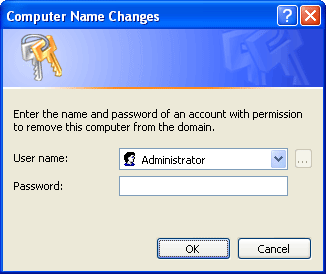
- When you click OK, you will be prompted to provide the login credentials for an account with permission to remove this computer from domain. Just type Administrator in User name box, and leave the password box empty. Click OK.
- Reboot your computer for the change to take effect. Now you’ve successfully removed Windows XP from a domain.