There are many ways that could be used to password protected a computer or a laptop. You can set a BIOS password or a Windows administrator password to lock your system but these types of protection can be broken easily. BIOS password can be erased by removing the computer’s battery and Windows admin password can be reset with PCUnlocker Live CD.
The most securable method is to set a hard drive password (also known as HDD password). HDD password is stored inside of the hard drive’s firmware area (which is located on the platters). Since the firmware area cannot be read with any widely available software, the password cannot be read or removed. Most modern computers support HDD password. In this tutorial we’ll walk you through the steps of resetting HDD password on Acer laptop.
How to Reset HDD Password on Acer Laptop?
- To reset HDD password, you need to boot your laptop in BIOS. Start your Acer laptop and hold on pressing F2 key to access BIOS.
- Once you come to the BIOS Setup utility, use the arrow key on the keyword to select Security tab.
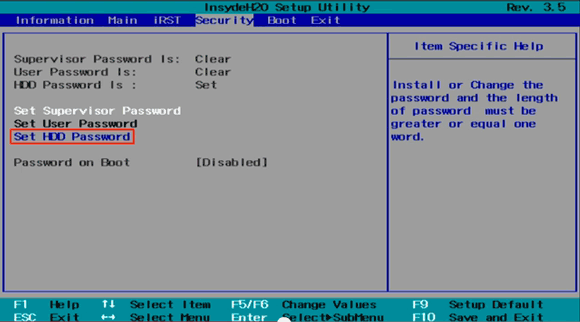
- On the screen, there are three password protection options: Set Supervisor Password, Set User Password, Set HDD Password and Password on Boot. Move the cursor to Set HDD Password and press Enter.
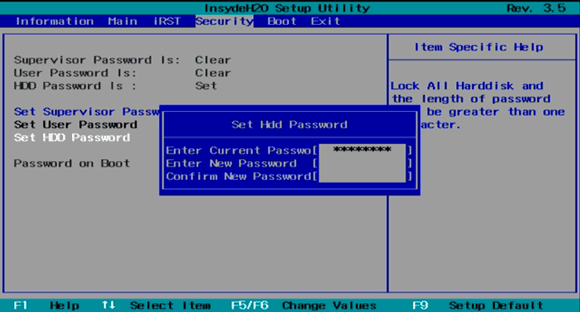
- Enter your current password and set a new HDD password. If you want to remove the HDD password, just left the new password field blank. Confirm your password and save your changes.
Forgot Your HDD Password and How Can You Remove It?
Forgot your HDD password and can’t remember it? There is no other option but contact your computer manufacturer, send your hard drive to them for accessing the firmware area and remove the password.
However, if you don’t care about the data on your hard drive, pull out the hard drive and put it on as a secondary disk onto another working PC, format your hard drive and connect it back to the original computer and install a fresh copy of Windows again.