If you need to frequently access a shared folder that is stored on a networked PC, it’s necessary to map a drive letter to that shared folder to make it easier to access. In this tutorial we’ll walk you through the steps of mapping a network drive in Windows 10.
How to Map a Network Drive in Windows 10?
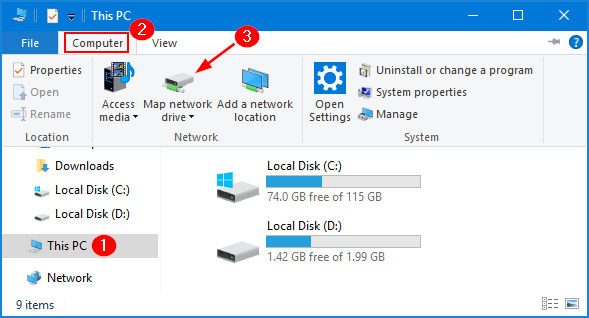
- Press the Windows key + E shortcut to open a File Explorer window.
- Click This PC from the left navigation pane. Select the Computer tab at the top and then click the Map network drive button.
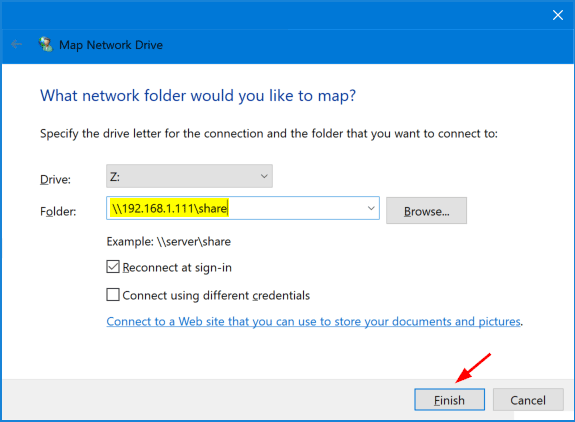
- Click the Drive drop-down menu and choose the drive letter you want to assign, then enter the address of the shared folder to which you want to map the drive and click Finish.
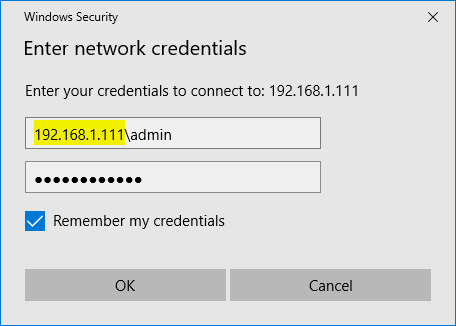
- When the Windows Security dialog box appears, type the username and password of the computer that is sharing the folder you want to map. Note: If you keep getting the error message “username or password is incorrect“, try to give the username as “ip_address\username“.
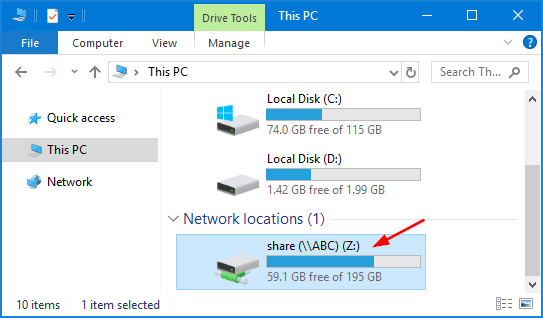
- After mapping, the network drive will show up in File Explorer. You can click that drive to access the shared folder as though it were a local drive.
If you want to remove mapped network drive, just right-click on it and select Disconnect.
If you’re running Windows Server Core without a GUI, you can map a network drive using the command line. Just type the following command, where Z: is the drive letter you want to assign to the shared folder. The persistent switch can make the mapped drive persist over reboots.
net use Z: \\remotepc\sharename /persistent:yes
Once pressing Enter, it will prompt you to enter the credentials of an account authorized to access the shared folder.
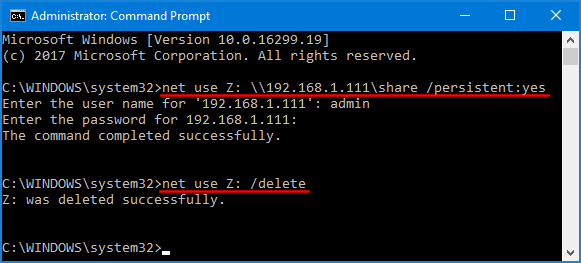
You can later delete a mapped network drive by typing in the command below.
net use Z: /delete
That’s all there is to it. If you have any problems mapping a network drive in Windows 10, post a comment. Enjoy!