Selection check boxes don’t show up in File Explorer? How can I remove check marks on desktop icons? File Explorer allows you to use check boxes to select multiple folders / files without having to hold down the Ctrl key. When some files are selected or you hover the pointer over a file, check boxes will appear and you can check or uncheck to make your selection.

This feature is very useful for tablet users. If you’re accustomed to use the Ctrl key to select multiple files, you can get rid of check boxes. In this tutorial we’ll show you 2 methods to add or remove check boxes to select multiple files in Windows 10 File Explorer.
Method 1: Add or Remove Check Boxes to Select Items via Folder Options
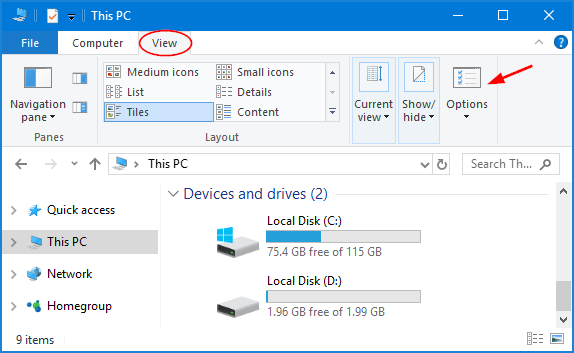
- Open the File Explorer. Select the View tab on the Ribbon and then click on Options.
- When the Folder Options dialog box opens, go to the View tab, scroll down to the bottom and check or uncheck the “Use check boxes to select items” option.
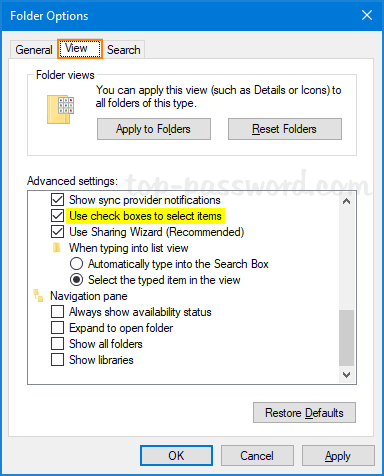
- Click Apply and then OK. Your changes will take effect immediately.
Method 2: Add or Remove Check Boxes to Select Items via Registry Editor
- Open Registry Editor and navigate to the following location:
HKEY_CURRENT_USER\SOFTWARE\Microsoft\Windows\CurrentVersion\Explorer\Advanced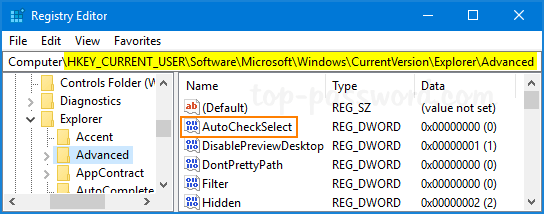
Double-click the DWORD AutoCheckSelect in the right pane to modify it.
- Set it to 1 to enable using check boxes to select items. Otherwise, set it to 0 (this is default setting).
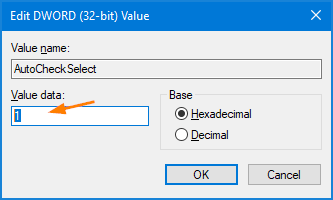
- Log off or restart your computer to apply the changes.