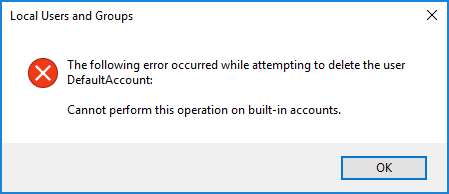
DefaultAccount is a built-in local account that exists on every Windows 10 installation. By default, it is disabled and doesn’t show up on Windows 10 sign-in screen. What does DefaultAccount use for? DefaultAccount was created and used by the system, and it’s a member of the System Managed Accounts Group. We can rename this account but unable to delete it.
In this tutorial we’ll show you 2 methods to enable the hidden Default Account in Windows 10, so you can log into this account and discover its purpose.
Method 1: Enable Windows 10 Default Account from Command Prompt
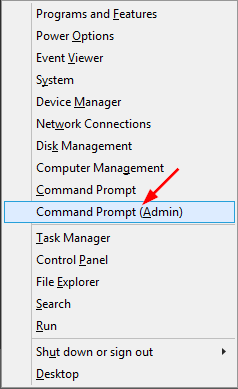
- Open an elevated Command Prompt in Windows 10. This can be done by pressing WIN + X shortcut and selecting “Command Prompt (Admin)“.
- Type the following commands one by one, press Enter after each. This will activate the DefaultAccount account and change it to standard user.
net user DefaultAccount /active:yes

net localgroup Users DefaultAccount /add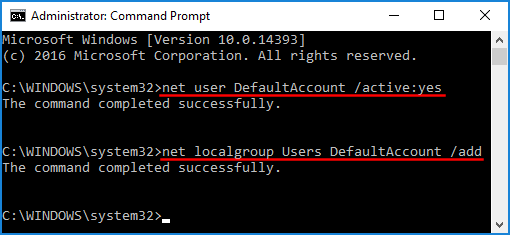
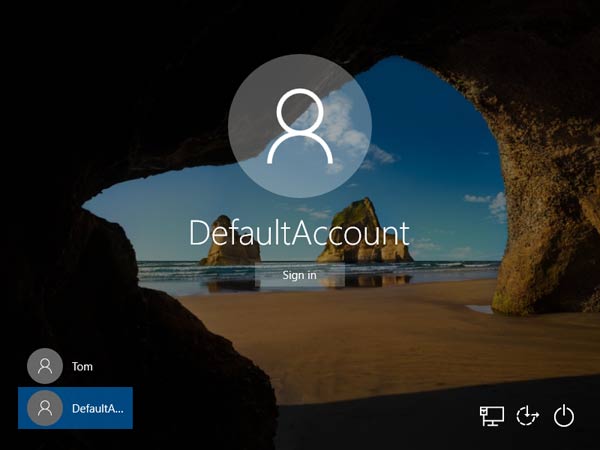
- When it’s done, reboot your computer and you can then log into DefaultAccount without typing a password!
Method 2: Enable Windows 10 Default Account from Computer Management
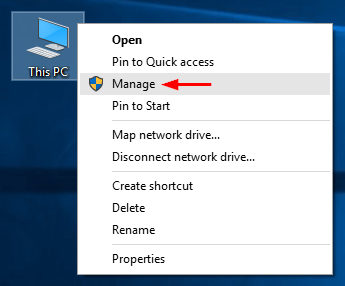
- To get started, you need to open the Computer Management. Right-click the This PC icon on your desktop and select Manage.
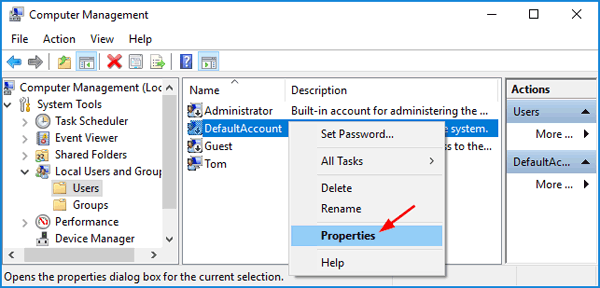
- Expand System Tools -> Local Users and Groups -> Users on the left side. On the right side, right-click on the DefaultAccount and select Properties.
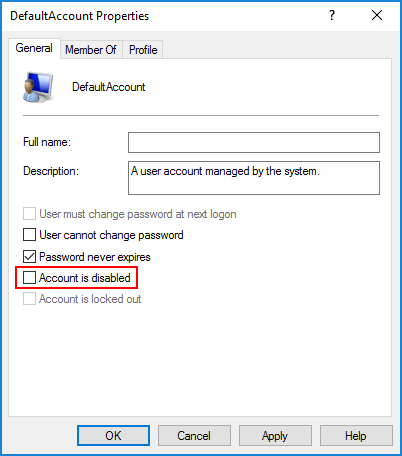
- Uncheck the option “Account is disabled“.
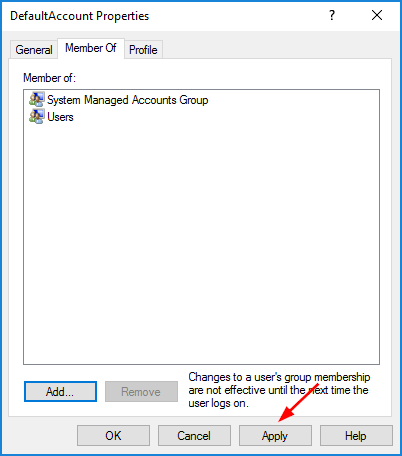
- Now we need to add this user to the Users group. Click the Member Of tab at the top, and then click the Add button.
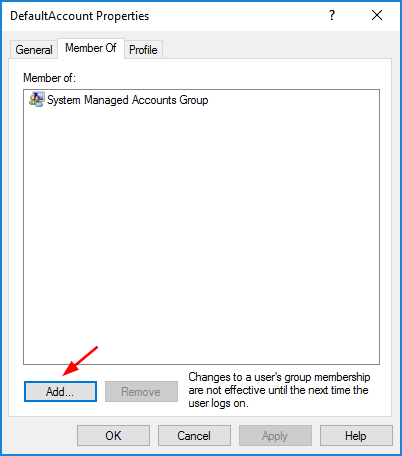
- In the Select Groups window, type Users in the object name box and click OK.
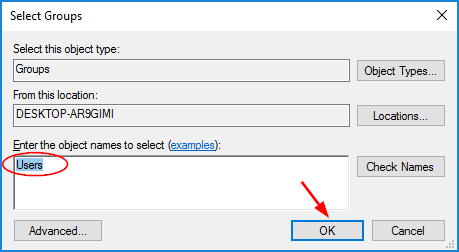
- Click Apply and then OK.
Now reboot your computer and you can see the DefaultAccount user show up at Windows 10 login screen.