How can I deactivate a local account temporarily? Is there a way to restrict a user from logging into your computer? In this tutorial we’ll show you 4 simple methods to disable user account in Windows 11.
Method 1: Disable User Account via Local User and Group Management
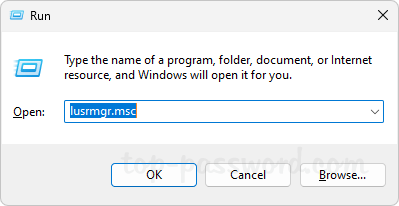
- Press the Windows key + R to open the Run command box. Type lusrmgr.msc and press Enter to access the Local User and Group Management.
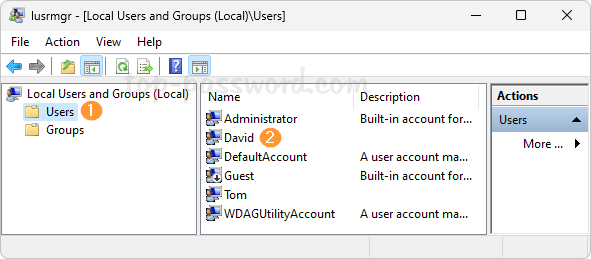
- Click the Users node in the left-side navigation pane, then double-click on the user account you want to disable.
- In the displayed Properties dialog box, check the “Account is disabled” option and click OK.
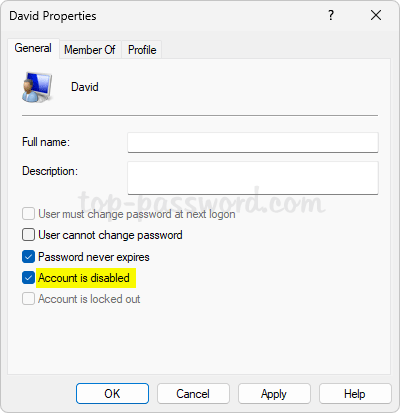
- Now you’ve successfully disabled a user account in Windows 11. The selected account will disappear from Windows login screen.
Method 2: Disable User Account via Command Prompt or Windows Terminal
- Right-click the Start button in the taskbar and choose the “Terminal (Admin)” option, or launch an elevated Command Prompt.

- Enter the following command and press Enter. Replace Account_Name with the actual name of the user account you want to disable.
net user Account_Name /active:no
- Windows will disable the specified account immediately.
Method 3: Disable User Account via Windows PowerShell
- Open Windows PowerShell as administrator, and execute the following command:
Disable-LocalUser -Name "Account_Name"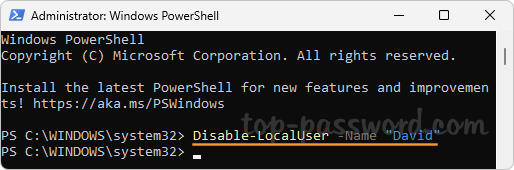
Substitute Account_Name in the above command with the user name of the account that you want to disable.
- Reboot your computer and Windows should prevent that account from signing in.
Method 4: Disable User Account via Windows Settings App
You can only use this method to disable a family member’s account. It doesn’t work with Microsoft accounts or local accounts.
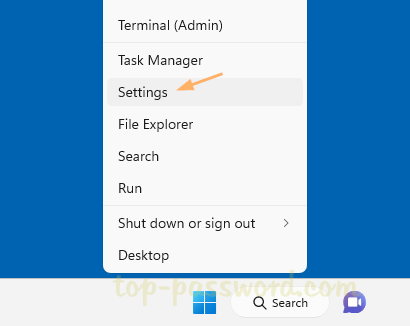
- Right-click the Start button and choose the Settings option.
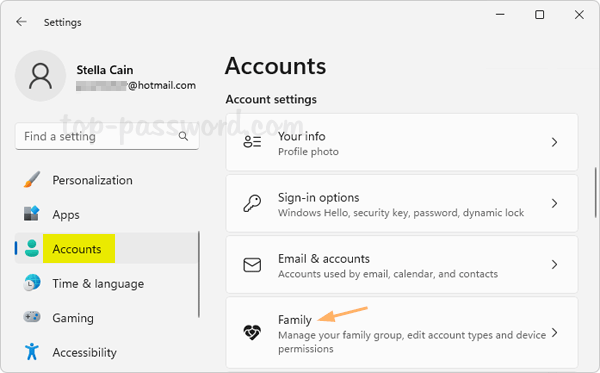
- When the Settings app launches, select the Accounts tab on the left sidebar and then click Family from the right pane.
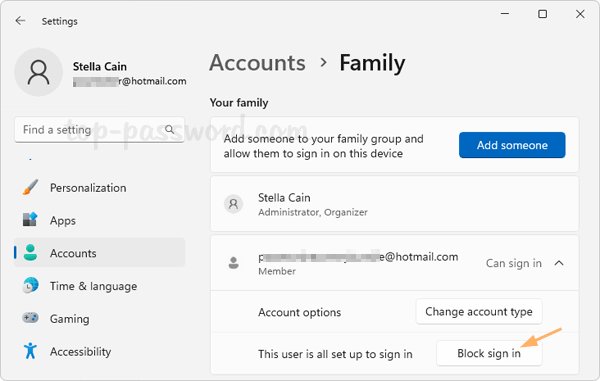
- Under the “Your family” section, click on the account you want to disable and then click “Block sign in“.
- In the pop-up dialog box, click the Block button to confirm.
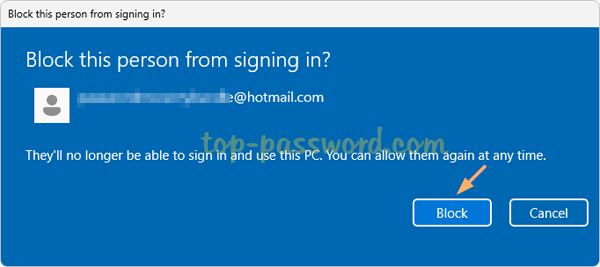
- The disabled user account won’t be able to sign in until a family organizer re-enables the account in the future.
That’s it!