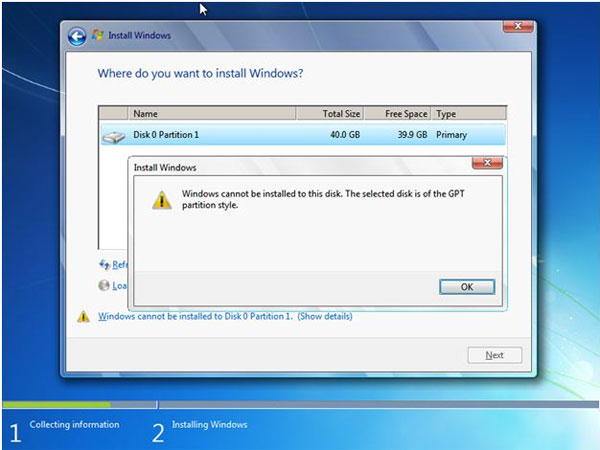
Unable to boot an UEFI-based computer from Windows 7 installation DVD? Have you received the error “Windows cannot be installed to this disk. The selected disk is not of the GPT partition style” during Windows 7 setup? These problems might happen when you downgrade from Windows 8 to Windows 7 or perform a clean install of Windows 7 on an UEFI/GPT computer.
Many new computers are shipping with the option to boot Unified Extensible Firmware Interface (UEFI) instead of standard BIOS. Secure Boot is a feature on UEFI-based PCs that helps increase the security of a PC by preventing malware from running during the boot procedure. However, it can also prevent PC owners from installing other operating systems – including Linux and older versions of Windows like Windows 7.
So if you’re going to install Windows 7 on UEFI/GPT computer, you need to enable the Legacy boot option and disable Secure Boot. Additionally, you might also need to convert your hard drive from GPT partition style to MBR, because Windows cannot boot from GPT disk in legacy BIOS mode. In this article I’ll walk through how to install Windows 7 on an UEFI/GPT computer.
How to Install Windows 7 on UEFI/GPT Computer?
- To start off, you need to enter your computer’s BIOS setup. Disable the Secure Boot option and enable the Legacy boot mode, not the UEFI mode. Check out this article for detailed instructions: How to set a PC to boot with Legacy BIOS mode instead of UEFI mode.
- Put your Windows 7 installation DVD in the CD drive and set your computer’s BIOS to boot from CD. After booted to the DVD, you’ll come to this screen.
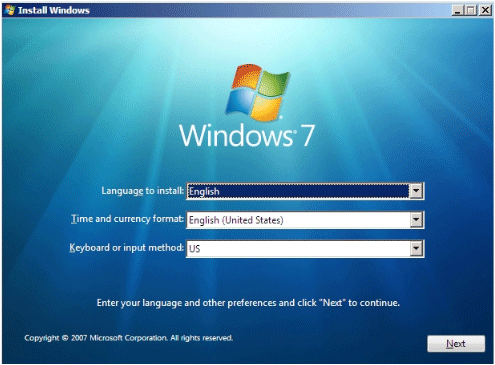
- At this screen press (SHIFT + F10) to open a command prompt window. Run the following commands one by one to convert your hard drive to MBR partition style:
diskpart

select disk 0

clean

convert mbr

exit - Close the command prompt window and continue the Windows 7 Setup installation.